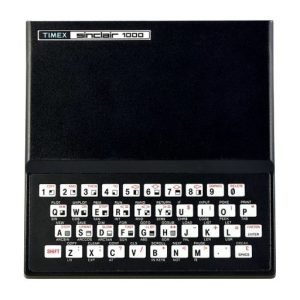
HOT Z-II
USER’S NOTES
Copyright 1983, Ray Kingsley
SINWARE
Box 8032
Santa Fe, NM 87504
HOT Z-II COMMANDS
READ mode commands are listed at the top of the keys in the
top of the two layouts below. Single-step commands are listed
on the same layout below the corresponding keys.
WRITE mode commands are listed on the lower layout. FUNCTION
key commands are not listed. Refer to your command list for
those.
type address to set cursor. Commands are SHIFTED.
INSRT SPON DEC FPFLG
1 2 3 4 5 6 7 8 9 0
BACK BPTS BPT2 BPT1
BASIC FPOFF HEXED RESET NTOP PRSC
Q W E R T Y U I O P
QUIT WNDOW RUN TWIN PRSC
  ASEM  1STEP DATA  FIXDF       ALNAM
   A     S     D     F     G     H     J     K     L     N/L
         SET               GO
SHIFT Z X C V B N M . SPACE
A,E: goto WRITE modes D – Back to data mode
very useful in Edit or Assembly -> INSRT 1
Single-stepper -> 1 BACK
back to BASIC -> 3 QUIT
3 – enter decimal address to se
Set regs. in Single-step mode
NEW LINE – Enter: page through memory
H – swap name files
R – back to BASIC or exit single-step
LOAD DENAM END1 2 3 4 5 6 7 8 9 0
HEX+/- SAVE HEXED RUN TRAN LLIST
Q W E R T Y U I O P
  ASEM  1STEP DATA  FIND  NAME  ZAPP
   A     S     D     F     G     H     J     K     L     N/L
SHIFT Z X C V B N M . SPACE
A,E toggle between modes
T transfer cursor to END to DEST
Y Copy screen (dis-assem mode) or to END (write modes)
G Assign a name (must be in ASSEM mode!)
3 Zap a name ” ” ” ” “
4 Set END (very important command in Hot Z!)
The enclosed cassette contains the following:
16K HOT Z followed by Big REM followed by a NAME list. These are named HOT Z, BIGREM, and NAMEs. The NAME list requires more than 16K. Load it from 2EB2 to 4000 or from BEB2 to A000, for example. Then enter values at ALNA: 82-2E-B2-2E-FE-3F; hit shift-H. 64K HOT Z followed by a NAME list for that version. These are named HOT Z and NAMEs. A printed annotation or the NAME list will be available at nominal cost in the near future. LOAD the NAME list from E000 to F184 or any comparable memory space; values to set at FEE0 would then be 00-E0-06-E0-B2-F1; then press shift H.
See the notes on loading for loading and backing up the tape.
In “Hi-Z”, names table already included. You have
room for a few additional names (temporary),
but for more names you should set up alternate names file
THIS IS HOT Z-II
The enclosed tape holds versions of HOT Z-II for 16K and for
64K machines. However. HOT Z-II allows you to create your
own, customized version from the original: The only difference
between The two copies on the tape is their memory occupation;
the 16K tape has all of the commands available to the 64K
user. but of course much less workspace. If your projects
with HOT Z ere always cramped, then you should consider
expanding your memory end installing one of the modifications
that allows you to run code above the 32K boundary. (Use the
16K version as the simplest starting point for the relocations
described in the later section on Relocating HOT Z.)
Those of you with 16K can only run the 16K version from the
tape. However, you can test-load the 64K side to be sure that
the cover comes un undistorted, which indicates a good load.
(After you hit a key, the 64K version will crash in 16K.) With
64K you use either version or create your own version to
give you access to memory currently occupied by HOT Z.
We will assist those of you who have loading problems by
exchanging your tape for an alternative dubbing. However,
please do not make things difficult for all of us by using the
Oldest cassette machine in the house and sticking with it.
They need constant cleaning end occasional adjustment of the
head. Irv borrowing another recorder before returning the tape.
It is true that irregularities in tape and cassette
cases do make some tapes unloadable, and we ask for no
apologies when you return a tape. We have exchanged tapes
widely and throughout the world, and about all we can say of
the medium is that anything can happen.
HOT Z-II combines a line-by-line assembler, a labelling
disassembler, a single-stepper and a simple editor. The
purpose of HOT Z is to give you a reasonable degree of direct
control of your computer, as well as to assist you in writing
assembly language programs to extend your control.
HOT Z will cohabit with a BASIC program, although BASIC is a
foreign language to HOT Z and must be read as data when HOT Z
is in command. Standard versions of HOT Z reside in high
memory but below RAMTOP. so if you plan to work extensively
with both HOT Z end BASIC you should use the command provided
by HOT Z to move RAMTOP below HOT Z.
A minimum requirement far running HOT Z is some knowledge of
the hexadecimal (hex) number system, which uses the characters
0-9 and A-F as its 16 digits, These instructions were written
with the assumption that you know the fundamentals of Z80
machine code. If you do mot, you should acquire a Z80
programming book. The one by Zaks (from Sybex) is useful, but
those written specifically for the ZX are generally more
simple. If you ere learning, then use HOT Z as a blackboard
to work out the exercises.
LOADING AND CASSETTE CARE
It is possible to ruin a data cassette in the same way as a
floppy disk can be ruined. A low-quality or poorly maintained
cassette player can impose glitches on a tape and make it
unloadable. Dirty cassette players will eat tape. Don’t take
the chance. Make a back-up copy first and save this original
for the day when the back-up fails.
LOAD your original tape with LOAD “”, (LOAD “HOT Z” will work
too.) With the 16K version, when the cover comes up and asks
you to “PRESS ANY KEY TO REGIN”, you can make a copy by
starting a fresh cassette on RECORD and pressing the S key.
Your computer will output a backup copy to tape if you have it
running. Any other key will start the program.
In more than 16K. you should be aware of the following method
for duplicating any ZX tape that loads according to the ROM’s
BASIC protocol. That protocol requires that the data segment
(as opposed to the name header) begin loading at address 4009
(VERS) and load as far as the address that comes up in 4014-5
(ELIN). With that knowledge., you can LOAD any tape as data,
provided you LOAD to an offset from the intended area of the
ROM’s system variables (4009—407C).
For duplicating HOT Z or any long program, you need an extra
16K, that is at least 32K of RAM. Then get HOT Z running and
learn how to use its commands. LOAD the original HOT Z tape
via the HOT Z LOAD command with the cursor set at address 8009
and with END set to, say 8080H just for practice, then stop
your recorder with the PAUSE key if you have one, but stop it,
and rewind it immediately so that you don’t forget and start it
in the middle, which is one way to ruin a tape.
Now your memory should read out an an offset set of system
variables, the ones that will be coming in from the tape, and
the address at 8014-5 (lo-hi) will give you one more than the
last address to be loaded from the tape. Take that value, add
the offset, and enter it as prescribed to set END (the TO key,
as in TO the END), then start recording the tape from its
beginning again. This time you will load a full copy, as
data. of the tapes contents. If you just SAVE the same
memory contents to another tape, then you have a backup tape
that will LOAD in the normal manner from BASIC. You have also
become a copier, and if you persist in that wantonly you will
cause the extinction of programmers in your species of
computer, which might foreshadow the ultimate disaster of
model extinction.
The more important thing you can do with this technique is to
change the program you have loaded and to save the new
version. If you learn how to manipulate the system variables,
you can create self-loading tapes of great variety. For
example. you can direct where the ROM looks for its first
BASIC line by setting the start address of that BASIC line
into 4029-8 (NXLN). If you are writing machine code for a USR
call and if your routine sets NXLN before it does its RET to
BASIC. then your reentry to BASIC will begin with the line
whose address is in NXLN. Self-starting tapes also begin
with the line that NXLN points to.
If NXLN points to VARS memory space, then the BASIC
interpreter asks no questions but jumps up among the VARS and
tries to read what is there as tokenized BASIC code. If you
oblige it with a properly formatted BASIC line, then it does
what you ask (e.g. RAND USR etc.) The important thing about
introducing a machine routine from the variables block is that
you can wipe away all your initialization code by a call to
CLEAR, which is 149A in hex. HOT Z’s initializer jumps into
the memory space in the printer buffer (403C) to do that
CLEAR, and then starts the program.
We are frequently asked how to get a copy of HOT Z onto a disk
Or a fast~-load format. The ZXLR8 fast-load program has a data
mode, which is ideal for saving HOT Z. You can even hook up
the USR call that enters the ZXLR8 command mode as a HOT Z
command, so that there is no need to go back to BASIC to use
it. However, ZXLR8 returns in FAST and HOT Z requires SLOW,
so wheat you need is an intermediate routine like CALL ZXLR,.
CALL SLOW, RET. (SLOW is 0F2B.) Then put the address of this
routine into a dead key slot in the command file and use the
corresponding key for the command.
With a data SAVE, you should save the entire HOT Z program.
excluding the variables block, and then start HOT Z with its
USR cell after reloading. With the 64K version, you would
have to save the HOT Z program and file blocks separately, so
you would be better off loading the tape to 8009H, as
described above, and data saving that block, and then trick
your system into reloading to 4009 when you want to use it.
We regret that we have not had the opportunity to experiment
with the variety of systems that are now available for the
ZXLR8, but if your system lacks a data SAVE, then you should
stamp your feet at the door of the producer of that system.
MEMORY MAPS
Brief memory maps of the versions on tape are as follows:
16K Version
4009 407D 4396 4400 4E00 504B 517B 5B00 7F20 7FB0 8000
+——–+———+———-+—————+——-+———+———+———–+——+—————+
System Display Calculator Your Work Area NAMEs HI Jump HZ Files HZ Program Stack HZ Variables
Variables File Stack Tables
64K Version
4009 407D 4396 4400 5B00 7F20 F3A0 F64B F77B FE00 FE60 FF00
+——–+———-+———-+—————+————+———-+——+———+——+——+——–+
System Display Calculator Your Work Area HZ Program Work area NAMEs HZ Jump Files Stack HZ Vars
Variables File Stack Tables
In 64K, the last 256 bytes above FF00 are unused.
RUNNING HOT Z-II
The following section provides an introductory tour of HOT Z.
The experienced and the adventurous among you may want to
plunge right in. If so, arm yourself with the short command
lists and the keyboard map and try your luck. Details of the
various commands are available in the later sections of these
notes.
If you use HOT Z-II to best advantage, you will discover that
it gives you a personal command of the machine (the Z80)
itself, with a few exceptions that stem from your hardware.
If those exceptions bother you then you might find it
advantageous to improve your hardware. The most interesting
hardware add-ons that we know of are currently coming from
John Oliger, 10115 Nassau Lane, Indianapolis, IN 46229.
These include a display board that turns your ZX/TS into
a conventional Z80 computer with use of a full 64K memory.
RAMTOP 80A8 81DC BF20-C000
\ | | |free space| | |
stack |vars|JP table|files|for names |names|pgm code|blank
——| | | | | | BF?F |
8000-809F 81F? 885F 9552 97FE C000-FFFF not used
\ /
2000-7F00 resident
your work area (!) NAMEs “HI-Z” map
AN INTRODUCTORY TOUR
The cover occupies the initial display file and evaporates
when you press a key. Then you should see the first screen
“page” of disassembled ROM. Down the left side of the screen,
you will see the memory-address column, to which everything in
HOT Z is keyed. These addresses are in hexadecimal and in the
format accepted as input by the program. In other words, all
addresses are four hex digits and include leading zeroes but
no identifying symbols either before or after. The format is
always there for you to consult as you make entries to HOT Z.
The address system runs from 0000 to FFFF, although the 16K
memory goes only to 7FFF. In a standard 16K memory. you may
find various parts of memory reflected into unused address
areas, as for example a repeat of the ROM code at 2000, 8000,
and/or at A000. This is hardware-caused, the result of
incomplete address decoding. In 64K, you are liable to find
that unused addresses above 8000 are cluttered with initial
garbage, which HOT Z can clean up for you.
The second column of the disassembly display lists the
contents of each memory byte, again in hexadecimal, two digits
per byte, packed together with no spaces between. These
numbers occur strictly in the order they occur in memory,
which is not necessarily an easy order for reading. This
column is raw data, as it were, against which any
“interpretation” can be checked. Z80 instructions can be from
one to four bytes in length. A HOT Z routine gets the length
of any instruction and parses the bytes into instruction-
length clusters, but it cannot decide whether those bytes hold
true Z80 code, as here, or simply numbers used as data. That
decision in the end is up to the reader. On this first page
of ROM, the first instruction is two bytes long, the second
three, etc.
The next column. the NAME column. will hold user-entered
labels for the corresponding address, along with a few labels
provided in a permanent file on your original tape. After
you have annotated a program with these labels, you can SAVE a
NAME file separately from HOT Z, to be loaded again with
whatever program the labels pertain to.
The fourth column presents those particles of electronic
poetry known es assembly mnemonics. Relative jumps (JR’s) are
listed, as in the sixth line, with their destination address
(or NAME) rather than the single displacement byte with which
they are coded. System variables for the ROM are listed by
an abbreviated name, as in lines 4 and 5.
You are probably familiar with these first bytes of ROM
through various PEEKs or publications. The first three
instructions turn off the nonmaskable interrupt that makes
SLOW mode work, load BC to count up to 16K of memory, and jump
to the initialization routine at 03CB. .The fact that only 16K
is cleared by initialization is very useful if you have a
larger memory and a reset button.
The rest of the screen is taken up by RST routines. RST 10
prints the character whose code is in A,RST 08 handles BASIC
error reports, RST 18 and 20 help with interpreting BASIC, and
RST 28 is the entry to floating-point operations, which are a
separate sub-language in the ZX. RST 08 and 28 are always
followed by one or more (for 28) bytes that serve as data
rather than as machine code. The meaning of such bytes is
listed in the mnemonics column.
The current HOT Z display is referred to in these notes as
READ mode or disassembly. The commands in this mode are
mainly for moving the display around to give access to
different parts of memory. The page flip, for example, is the
ENTER key: hit it to continue the disassembly with the
instruction following the one at the bottom of the screen.
For distant moves. you can enter a four-digit hex address to
the ADDR cursor at the upper-left screen corner. For example,
try 03CB to see the memory count and the initial loading of
RAMTOP.
During address entry, you can backspace to correct an error by
using the DELETE key. which works about the same way as it
does in BASIC. The difference is that DELETE doesn’t blank
out the entry and that you can’t back out of the whole entry
routine that way. To back out, use the ENTER (NEWLINE) key,
which works as an escape key in this situation. ENTER is not
needed after the last hex address digit.
In READ mode, you can also get to a named routine by entering
the four letters of an assigned NAME. Try KEYB. You will see
that the NAMEs appear in both the NAME column (referring to
the current address) and in the mnemonics column (referring to
the target address of CALLS or jumps).
In general, you can use a NAME in the file as a proxy for its
address in the READ, WRITE, or One-Step modes of operation.
Now try the shift-D command from READ mode. This is the
display switch, and successive strokes of the the same key
will take you back and forth between the data and the
disassembly displays. The data display is for examining those
parts of memory that are used as files of data rather than for
ZB0 code. The first and second columns contain the single
address and its content in hex, values that are reflected in
decimal in columns four and five. (Use it as a conversion table.) The far right column gives the CHR$ of the contents of
the address and will turn up any BASIC programming or message
files. Enter. for example, the address 007E to see the
keyboard file. Flip through using ENTER to see how the
keywords are stored, with their final characters in inverse.
Switch beck to disassembly while you’re still looking at the
keyboard file for a taste of what disassembled data (sometimes
called nonsense) looks like. It’s up to you to distinguish
sense from nonsense when reading a strange program: the
display switch is there to help you do it.
The NAME column in the data display functions differently from
the column with the same heading in the disassembly. The
NAMEs in the data display are those that correspond to any two
successive byes, taken in lo-hi order, in the second column.
(The disassembly displays NAMEs assigned to the addresses in
the first column.) Some NAMEs in the data display can crop up
by chance: for example, two NAMEs immediately together mean
that at least one is spurious.
Use the T command in READ mode to go to the beginning of the
NAME file. The NAME file grows downward like a stack, which
it is not, as you add new NAMEs to memory addresses. Turn on
the data display to see the structure of the NAME file. Each
NAME takes six bytes: the first two hold the address to which
the NAME is assigned, hence the listing in the NAME column,
and the next four hold the NAME itself, which shows in the
CHR$ column. Other odd CHR$ symbols will appear at random for
some of the address bytes, signifying nothing.
The data display is also useful for looking at or creating
display files.
You can enter decimal addresses to the ADDR cursor, but these
must be prefixed by the shift-3 (THEN) command, which
will put up a D after ADDR. Try it with 16384, which may be
familiar. Check the conversion with the data display. If you
enter a decimal address of less than five digits, then you
have to press ENTER to tell HOT Z that you’ve finished. If
you enter a decimal higher than 64K, the program will subtract
64K end give you what’s left.
Now get into disassembly and go to 1CAA, which is where the
ROM begins the BASIC function LN. Hit shift-W to turn on
the floating-point interpreter. You will see here and
on succeeding page flips some of the floating-point calculator
language. which is described in another section of these
notes, At 1CAF you will see a rendition of a BASIC error
report after RST 08, in this case for a negative argument to
the logarithm. You can switch off the f-p interpreter by
hitting shift-W again, but you will have a more accurate
rendition of the ROM if you leave it on.
The last display on the tour is the Z80 register display or
Single-Stepper. It is one of the quirks of bilinguality that
this display must be entered from an area where the floating-
point interpreter is not switched on, so first enter an
address above 4000, say. Then use the shift-S command from
the disassembly.
The register display occupies the top three quarters of the
screen. The left column lists the various Z80 registers;
please refer io a good Z80 reference book if you need an
explanation of the register names. The double prime, or quote
sign, is the only symbol available in the ZX character set to
denote the exchange registers. The exchange flags are listed
es EXFLAGS.
The second column lists the hex values of the registers’
contents., Values for the accumulator (A) are listed at the
left of the column to remind you that A is the high half of
the AF register pair, along with H, D and B. The third column
either converts the second column value to signed-decimal
according to the two’s complement convention, or, if the
second column holds an address that has been NAMEd, then that
NAME is listed in the third column. The fourth column, headed
by the open parentheses, dives the hex value of the byte
contained in the address formed by the register-pair values.
(E.g. across from HL you will find the byte (HL).) The right
column gives the CHR$ of the byte in the fourth column (for
the register pairs) or of the byte in A.
The box below the one containing the exchange registers holds
details on the one-step user’s stack and the state of the
flags registers. The user’s stack is separate from the main
machine stack so that the system can absorb a few stack errors
without crashing the program. The top four pairs of bytes on
the user’s stack are shown at the right, along with the NAMEs
for any addresses they might hold, so that you can check to
see whether your test routines leave anything behind. The
main flags are listed below the exchange flags for easier
visual association with the conditionals in the program steps
below. Standard conditional mnemonics are given for the four
programmer’s bits.
The inverse-printed address at the left in line 18 serves both
as a cursor and to mark the address of the next step set up to
be executed by the single-stepper. You can enter any address
into that cursor just as you would in READ mode, or you may
also use a NAME. The ENTER key still serves as an escape
during address or NAME entry. but it has another more
important function as well, which is to run the next single
step.
If it’s not already there, enter 0808 to the NEXT slot, and
then notice the contents of the A and D registers just before
end after you press the ENTER. This is a fairly safe area and
you can experiment with a few more steps. (The things you
must be careful about are loading into some system variables,
either ROM’s or HOT Z’s, and some flag sets. LD (DF_CC),HL is
usually program hari-kari, for example. The SPACE key allows
you io skip the step at NEXT. The top line of Z80
instructions represents the previous step executed, and the
three steps following the one in NEXT are those that will be
reached if there is no branching. A branched-to step appears
directly in the NEXT slot; a skipped step disappears from the
display.
For faster debugging. you can set breakpoints (shift-4 and
shift-3 commands) end use the shift-G command to step through
the code as far as the first breakpoint encountered. Two
breakpoints are provided so that your can cover both sides of
a conditional branch. You must take care to set breakpoint
addresses that the code will actually encounter, since
stopping depends on finding a breakpoint exactly. The BREAK
key will stop the shift-G command if used quickly enough. You
can display the current breakpoints with the shift-2 command.
Learners might consider mastering the use of the Single-Step
first and then using it to see how the various instructions
and a few resident routines work. A lot of bugs can be
avoided by testing every routine you write with this device.
Hit shift-Q (Quit) to get back to the main READ display. You
will arrive at a screen page that starts with the address that
was in the NEXT slot of the Single-Stepper. If you spot an
error coming up at the bottom of the Single-Step display, you
can quit the display, EDIT the error on the disassembly
display, and get back to where you were in the Single-Step by
using the shift-S command from READ mode.
Writing and Editing Z80 Code
The READ mode is a essentially passive, allowing you to page
through the memory and examine its contents. The WRITE or
EDIT modes are there to let you make chances in the memory
content, provided that memory is RAM.
There ere essentially three WRITE/EDIT modes. With the
disassembly display, you can press shift-A and a cursor will
appear at the top line of the edge of the right column. This
is the assembly mode. Once you turn on the cursor, you change
the entire command system of HOT Z. The commands available to
you with the cursor on are listed as the WRITE-mode commands
on the command lists. Hitting ENTER with the cursor in its
“home” column will quit the WRITE mode and return you to READ,
where you can readjust the screen to another part of memory.
In addition to the command set, the up and down cursor
controls allow you to move the cursor to a given line or to
scroll the display page one line up or down by moving the
cursor up from its top position or down from its lowest
position. Up scrolling is automatic when you ENTER a line
that is third from the screen bottom.
You may also enter a new Z80 instruction to replace the one
listed on the cursor line. Just start typing and the existing
line will disappear. As you type, the delete key and the left
and right cursor controls will function as you expect them to.
If the cursor is over the top of a character, your next
keystroke will replace that character. If you want to insert
a character, press the EDIT key (shift-1) and a space will be
created at the cursor position, with all characters to the
right of the cursor being shifted one space right. The
rightmost character in the line (usually a blank) is destroyed
by this insert command. You cannot jump to another line with
the up or down cursor command while you are in the middle of
editing a given line.
When you have entered the intended Z80 instruction, hit the
ENTER key to put the proper code into memory. If your entry
is in the proper format, the cursor will return to the left
edge of the column and move one line down, ready to edit the
next line. If the cursor stays put in the line you are
working on, then it indicates a format error in the mnemonic
entry.
HOT Z-1I follows the format of the mnemonics listed in the
Zilog Z80 technical manual. This format is essentially the
same as that listed with the character set in your computers
instruction manual, with the following exceptions: the RST’s
are followed by a hex byte (08,10,18,20,28,30,38) rather than
decimal and the OUT (N).A and IN A, (N) use the parentheses
shown here. (N is always a two-digit hex byte.) As a general
rule, the open parenthesis is always preceded by either a
space or a comma, and spaces are always important.
When HOT Z fails to accepts your entry, it locates the line
cursor at the first position that does not match its template
for a proper instruction. Sometimes, however, as with an
omitted space or an unassigned label, the cursor may appear
earlier than your particular format error. (For example, it
will flag the first letter of a label even if only the fourth
letter is “wrong”. )
If you get stuck and can’t get HOT Z to accept what you’ve
entered, you can abandon ship and restore the original
mnemonic by hitting the FUNCTION key. Your recourse then is
to look elsewhere in the disassembly for the format of the
instruction you have been trying to enter, or to look up the
hex code for that instruction and to enter that in the hex
column (See below.) to discover how HOT Z lists the mnemonic.
If you try to back out of a line with the cursor-left key, HOT
Z will act as if you have tried to ENTER the line. If you
write all the way to the end of the line an ENTER will also be
automatically appended. This occurs with some of the IY+N
instructions. which just fit in the alloted space.
You can use a preassigned NAME in an instruction anywhere that
a l6-bit (four hex digits) number occurs. For example,
LD HL. (RMTP) is equivalent to LD HL, (4004). You must give a
NAME to a particular address (shift-G command in WRITE) before
you attempt to use it in an instruction.
Relative jumps (JRs and DJNZ) are normally entered with the
destination address or NAME. However, for the JRs only (not
DJNZ) a second form is available for short forward jumps where
you haven’t yet assigned a NAME but know how far forward you
want to jump. JR +5 will jump ahead over five bytes. The
plus sign is required and the displacement is in decimal
with a range from 0 to 127. Backward jumps are not catered
for in this way: it is easier to look back for the address you
want to get to.
Provided you do not want one of the last four conditional
expressions (M, P, PO, or PE), you can use relative jumps all
the time, and if the destination address is too far away HOT Z
will convert your JRs to JPs (absolute jumps) rather than
report an error. The reverse is not true: if you enter a
very short absolute jump, HOT Z will take your word for it.
This conversion works well for entry of new code, but you must
beware when editing in the middle of an existing routine,
because if a two-byte JR is edited and becomes a three-byte
JP, then the first byte of the following instruction will be
overwritten.
There is no ORG command because you are doing the ORG yourself
with HOT Z. However, direct data entry is possible in the
assembly-edit mode through use of the DB pseudo-op. DB may be
followed by a quoted string (DB “ABCDE”) or by an even number
of hex digits (Db 090F 0D3A). Spaces are ignored in reading
the hex digits, except for the required space after the DE.
Each pair of hex digits is read as one byte, and a single
digit left over will be ignored. You can write a string or
series of digits all the way to the end of the line.
When you hit the end, HOT Z will add the quote if necessary
end enter the line. Upon entry, the editor enters one
character (for a string in quotes) or two hex digits per byte
startling with the cursor address for as many bytes as it takes,
then resets the screen layout so the next cursor address is at
the top of the screen. The reason for this is that the data you
have enter ed would be disassembled by HOT Z, producing a
nonsensical listing. You can look back with the data display to
assure yourself that what you have entered is indeed there.
The DB is simply a means of entering data without leaving the
assembly-edit mode. You should still assign NAMEs to your
strings or variables and use them in referencing the data.
The insert command is recommended when you enter data into an
existing code block.
If you want to use the RELOCATE command (described below),
then you should not mingle small blocks of code and data.
Keep them in large blocks and keep track of what is where.
In addition to string entry with DB, you may also enter quoted
non-inverse characters for direct eight-bit register loads or
for direct arithmetic/logic operations. LD A,”A” will
assemble as LD 6,26 and CP “Z” as CF SF. Sixteen-bit (double)
register loads are not treated in this way.
Hex Edit Modes
Hit the shift-E key with the disassembly display to get into
the main hex edit mode. The “home” column for the cursor in
this case is between the address and hexcode columns at the
left of your screen. Cursor controls work as with the
assembly-language editor.
To change the hex content of memory, you may either move the
cursor over with the cursor-right key or retype the line,
using the keys from 0 to F. With the disassembly display,
each line holds the correct number of bytes for a single Z80
instruction. If you write a one-byte instruction, the cursor
will jump to the next line immediately: for multi-byte
instructions, the cursor waits on the line until the required
number of bytes have been entered, then jumps automatically.
The purpose of this feature is to allow you to copy hex
listings from printouts or magazines. You can just type away
without worrying about hitting ENTER at every line, and the
screen will scroll along with your entries.
With the edit mode, what you see in the hex column is what you
get when you make an entry, byte for byte. Edit does not use
NAMEs and you have to calculate the displacements for any
relative jumps you enter.
All of the WRITE-mode commands are available with the hex-edit
cursor on screen. There is, however, no character insert
while you are editing a line, and the escape key in the middle
of a line is ENTER rather than FUNCTION. If you need to
change the first byte of a line after you have started editing
it, you should escape by hitting ENTER and start over.
You can hit the shift-D (display switch) key either before or
after you have gone to the hex-edit mode in order to obtain
the data-edit mode. This mode lets you change one byte at a
time by writing a new value over the top. This is the mode
that you would use for entering hex data files, addresses and
the like. (Use the DB command from the assembly mode for
entering text files.) All write commands are available from
this mode as well. except the NAME (shift-G) command functions
differently than it does with the disassembly display.
Shift-G will no longer assign a new NAME, but can be used to
write a preassigned NAME to the NAME column, and the address
to which that NAME belongs will then appear at the cursor
address and the byte following. The intended use is for
creating address files (jump tables).
Inserting end Deleting Lines (All WRITE/Edit Modes)
What happens when you press ENTER after writing an instruction
is that HOT Z reads the address of the line you are working
on. looks up the the numeric code of the instruction. and
enters that code into as many bytes as it takes. Then control
goes back to the disassembler, which reads back your code into
Z80 mnemonics and revises the screen page accordingly. An
important consequence of this is that when you are editing an
existing block Of code you must be careful not to overwrite
more lines than you intend to (by entering a four-byte
instruction over a two-byte instruction, say) and to watch out
for new instructions that crop up when you overwrite a long
instruction with a short one (one-byte over a three-byte
instruction. for example).
If you don*t know the byte length of Z80 instructions. the way
around the above problem is to use the line-insert (shift-1
or EDIT) and line-delete (shift-H) commands whenever you are
editing an existing block of code.
When you insert or delete a line, a block of code is moved
either to make room or to close up the empty space. One end
of that block of code is datamined by the cursor: the other
end must be datamined by you before you start your editing
session. Whenever the WRITE cursor is on. a variable called
END is displayed in the upper right corner of your screen.
END marks the other end of the active memory block for an
insertion or a deletion or indeed for any block operation,
such as a clear, a fill, a SAVE, or a transfer. END is set
with the TO key (as in TO the END) followed by four hex digits
or a NAME. On some types of entry errors, you may be asked
twice for the proper value.
You should set END whenever you begin an editing session. END
Should be within your workspace and not overlap with the HOT Z
program, lest you move sections of HOT Z around and lose
control of your computer. For the insert-line and delete-line
commands, a special restriction has been. added to the value of
END. For those operations, END must be within 256 bytes of
the cursor address, or else you will be asked (automatically)
to enter a new value of END when you give the insert or delete
command. At that point, HOT Z will accept any value you enter
for END and perform the operation. The purpose of this
behavior is io catch those times when you have forgotten to
set END. and io save you from a possible crash.
For insertions end deletions, END can be either above or below
the cursor address. The “usual” value would be for END to
point to an address higher than the cursor address, in which
case an insertion would push all values to higher addresses to
make room for the new instruction. For example. if you insert
a two-byte instruction at 4C10 with END set to 4C80, then all
instructions from 4C10 will be moved two bytes higher until
4C7E. which will go into 4080, and the original contents of
4C7F and 4C80 will be destroyed. A deletion of a two-byte
instruction would move all instructions to lower addresses,
and the contents of 4C7F and 4C80 would be duplicated in 4C7D
end 4C7E.
Oi the other hand, if the address in END is lower than the
cursor address, then an insertion will leave the following
addresses undisturbed but will push the contents of preceding
addresses to lower addresses as far as END. For example, with
END set to 4C00 and the cursor at 4C10, insertion of a
three-byte instruction would destroy the contents of 4C00,
4C04 and 4C05 by overwriting them with the contents of 4C00,
4C04 and 4C05, respectively. Analogously, a deletion would
duplicate the first three (or N) bytes in the next three. The
insertion itself will in this case go into the address
preceding the cursor address. This feature is useful when
you are editing in a constricted memory block with blanks that
may be either above or below.
After insertions or deletions. the cursor position may have to
be adjusted for your next entry. (The preceding discussion
uses “above” and “below” to refer to numerical values of
addresses, not to screen position, where addresses get higher
as you go down the screen.)
When a NAME is assigned within a block where you are inserting
at deleting lines, the NAME will move with the instruction to
which it is assigned. The displacement assigned to relative
jumps is not adjusted, so JR TARG may read JR 4C22 after an
insertion that pushes TARG from 4C22 to 4C23. Be sure and
label all JR destinations and then check that the labels are
still correct after an editing session. If you use labels all
the time. then an error will stand out clearly.
When you are editing the data displav, all insertions and
deletions affect one byte at a time.
Using WRITE Commands
Many of the WRITE commands affect a block of memory and
require that the END variable be set first to a proper value.
Use the TO key to set it. Aside from its use for insertions
end deletions of lines, END is generally set to denote the end
Of a block of code. whereas the cursor marks the beginning.
If END is less than the cursor address, the block is generally
taken to be null. though sometimes the operation will still
affect the very first byte. Most operations include the END
address; the exceptions are SAVE and LOAD, which finish one
byte before. (This makes it effectively impossible to LOAD or
SAVE address FFFFH, since the next address is 0000, which is
less then any cursor address.)
The block commands are LOAD, SAVE, FIND, transfer, clear,
fill. print, readdress and relocate, in addition to the line
insert and delete described above. The simpler commands are
shift-A and shift-E. which toggle the cursor across the screen
between assembly-edit and hex-edit; shift-D, which toggles the
display between disassembly and data and works only in
hex-edit because you can’t assemble data; shift-G and THEN,
which allow you to assign or delete a NAME at the cursor
address: shift-S, which takes you to the single stepper;
shift-R, which transfers control to the program beginning at
the cursor (Novices beware!); and FUNCTION followed by the
2-kev. which moves RAMTOP and the stack to the cursor address
and those below.
The two cassette commands (LOAD and SAVE) allow you to move
the contents of individual blocks of memory back and forth to
end from tape. Such tapes will only be loadable by the
corresponding BASIC command if the bytes of memory are in the
form of a BASIC program, as explained in the earlier section
on copying tapes. However, you can Save your machine-code
program drafts and your NAME files with HOT Z, and then load
them again to continue working on or testing them. The LOAD
and SAVE addresses do not have to correspond, but you must
have the same block length from cursor to END if you want to
preserve the whole tape. (This is why you can load BASIC
tapes at an offset.) If you LOAD a tape that is too long for
the assigned block. the extra part is cut off; if you attempt
to LOAD a tape that is too short for the assigned block, you
will get the familiar “searching” pattern on screen when the
live part of the tape ends: hit BREAK to restore HOT Z and the
portion of memory loaded. If you BREAK during the active
portion of a SAVE, HOT Z will restart itself, losing the value
assigned to END and initializing the stack, the NAME file, and
any values held in the register display. (Your NAME file can
be recovered. See the section on NAMing.)
LOAD and SAVE both take tape names, which are entered without
quotes after you give the command and before you press ENTER.
Maximum length for such tape names is the length of the
command line (top) on which they appear: If you exceed that
length, HOT Z reads an ENTER and begins to execute the
command.
The TRANSFER command allows you to move the contents of one
block of memory io another block. The first thing to do is to
make sure that your destination block will hold the source
block without overwriting something you want to keep (or HOT
Z). You have the option of copying just the code (shift-T) or
of copying the code and moving the NAMEs assigned to it as
well (FUNCTION-6). The original o* the code will not be
erased by this command. You can copy from ROM but of course
not into it.
To use the transfer command, set END and hit the appropriate
command keys, This will bring up a DEST cursor at the upper
left, which asks you for the destination address of the block.
HOT Z will wait for you to hit ENTER after that address, and
if you change your mind or find you’ve entered it incorrectly
you can bail out by hitting the SPACE key instead of ENTER.
After the command has executed, the display will move to the
address you gave to DEST.
The FIND command has a similar protocol to that of transfer.
In this case. set the cursor to the beginning of a block of
memory for which you want to find a match. Set END to the
last byte of your template. Hit shift-F. An address cursor
labelled LOOK will come up at the upper left. Enter the
address at which the search should begin; hit ENTER to proceed
or SPACE io back out. HOT Z will search 16K (4000H) bytes for
a match to the memory from cursor to END: if a match is found,
the display moves to it: if there is no match, the display
remains et your template in READ mode. If you find one match
and want to search for another, set the cursor again (shift-A
or shift-E), move the cursor down a line or two so it doesn’t
point to the beginning of the found match, and use the
FUNCTION-F command. If a second match is found, the display
will move to its if not, the display stays put. (NOTE: If you
ere searching for a block of 8 zeroes, say. and you find a
block of 12, then io continue the search you should move the
cursor down so that there are 7 zeroes or less below it, or
else you will find the same string all over again.
The CLEAR command (FUNCTION-0) will put zeroes in all bytes
from cursor io END. The FILL command will first ask you for a
keystroke and then fill the block with the code for the
character assigned to that key. If you clear or fill a block
of HOT Z or the stack, you are likely to crash.
The PRINT-SCREEN command in WRITE will send the contents of
the screen, starting with the cursor line, to your 2040
printer or to the Memotech parallel interface. Printing will
continue, interrupted by page flips of the display, until the
bottom of the screen that contains the END address. If you
forget to set END, you can BREAK to save paper.
There is also a hex-arithmetic command, which, though not a
block command, uses both the cursor address and END. The
Command is shift-D, and the result is the hex sum and
difference (END minus cursor address) of the two values, which
ere displayed in the command (top) line.
The Readdress (for jump tables) and Relocate (for programs)
commands are described in a later section of these notes, due
to their complexity.
A detailed description of all the HOT Z commands is also
included as a later section intended for occasional reference.
For normal use. you may want to detach the brief command lists
and the keyboard map included at the beginning of these notes.
Other sections will give you details on naming and NAME files,
the floating-point language interpreter, and the program
relocator. If there are specific commands which you find
absolutely opaque or unusable, please write to us for details.
HOT Z’s Flags
HOT Z uses the byte at 4021 in the ROM’s system variable space
as 8 bit-flags, so you could crash the system if you try to
load that byte. The significance of the bits is as follows:
0 Set for disassembly of RST 08h
1 Set for disassembly of RST 28h
2 Set for an INSERT in progress
3 Set by an input NAME, reset by an ADDR
4 Set for data display
5 Set for EDIT, reset for WRITE
6 Set for a scroll
7 Set for window in register display
HOT Z also uses 4078 and 407C to hold a restart address in
case you fall into a BASIC error trap (RST 08). Occasional
use is made of the system variables PPC, OLDPFC and STRLEN,
but this use does not, to our knowledge, affect the operation
of a co-resident BASIC program.
DISASSEMBLER FEATURES
The HOT Z disassembler has been specially programmed for the
ZX 8K ROM. The special features that are catered for are the
system variables, the BASIC error reports, and the floating-
point operations. which make up the ‘calculator language” of
the ZX.
Abbreviations of system variable names are included in the
permanent NAME file that loads with the program. The HOT Z
disassembler always uses the name for a system variable
whether it is referred to by absolute address (e.g. 400C) or
by a displacement from IY (IY+0C). However, if you want the
IY form from the assembler, you must write it out, since the
assembler will always substitute an address (two bytes) for an
entered NAME. We have added DBNC (debounce) for 4027 (decimal
16423) and HZFG for 4021 (16417), which is used as a flag byte
by HOT Z. Since these system variable names are part of a
NAME file, you can change the abbreviations to suit your own
taste by entering a new NAME over the top of the old one
(shift-G command in WRITE).
HOT Z-II also uses the system variables PPC, OLDPPC and
STRLEN, but this should have no serious on a BASIC program in
memory with HOT Z. CALLs you make to ROM routines should not
fail for incorrect system pointers. If you use the floating-
point routines, you should load HL’ with 10D2 before making
the CALL.
When an RST 08H is executed, the byte following the RST is not
code but is used as data to generate the BASIC error report.
HOT Z reads these bytes as ERROR 9, etc., rather than
generating Z89g mnemonics for them. If you are running the
disassembler over a block of data, you may see some queer
results, like ERROR Z.
An RST 28 is the ZX ROM’s entry into the floating-point
language, which is normally disassembled by HOT Z. If you
find this second language distracting, you can switch off the
f-p language interpreter with the shift-W command (READ).
If you want to know what is really going on in the floating-
point routines, then consult appendix A of these notes.
THE COMMAND SET
All commands are on shifted keys in order to allow all of the
alphabet for assembly editing. Following is a description of
each command. Remember to use the shift key with all commands
except ENTER and SPACE.
READ Mode
Key Description
A Sets the cursor to the top line and switches to the
assembly-edit mode. The same keystrokes will get you
from hex-edit to assembly edit. This command works
only when the disassembly display is on.
AND (Shift 2) Switches on or off a display of the stack-
pointer address in the upper right screen corner. The
default is Off, because it isn’t pretty. but you
should turn it on when you are test running your own
routines. There is a small amount of shock absorption
in the HOT Z stack, but if you should see it changing,
you should reset it with the R command (Read) and then
look very carefully at what you are doing to the stack
with the routine you are testing.
D The display switch from disassembly to data display or
back again. The same command works with the hex-edit
cursor on but not from assembly-edit.
E Sets the cursor to the top line and switches to the
hex-edit mode. This command also works from assembly-
edit mode without resetting the cursor line.
F Fix display file. Combs the display file and sets all
the line endings. Use it when one of your experiments
messes up the display. If you are in READ mode, This
command should work even without an ADDR cursor.
H NAME file switch. If you are using only one file, the
NAMEs are switched off or on. If you have two files
in memory, the command will switch from one file to
the other. The point of the double NAME file is for
revising a program under development, so that you can
use the same NAMEs at two different addresses.
Q Quit HOT Z for BASIC. HOT Z remains resident and can
be recalled with RAND USR 22528. If you want to
protect HOT Z, move RAMTOP first with FUNCTION-2 (Write).
R Restarts HOT Z. Reinitializes variables and resets the
stack. Purpose is to clear clutter from the stack.
S Switch to single-stepper. The address in the NEXT and
LAST slots will be last ones used there. Use this
command to get back after you have spotted and
repaired an error in the upcoming code. All old
single-step register values are preserved.
T Move the display to the start of the NAME file and
switch to the data display. Use this command as
preparation for SAVing a NAME file. (Turn on the
cursor, set END, and SAVE.)
THEN (Shift-3) Indicates decimal address to follow. The
command will add another inverse block to the ADDR
cursor. If the decimal address is less than five
digits long. hit ENTER after the last.
TO (Shift-4) Floating-point disassembler switch. This
is a flag switch (NOT an on-off switch) which
switches interpretation of a byte from Z80 language
to floating-point language. This command is necessary
for certain embedded sections of floating-point code
that are mot preceded by an RST 28 but are jumped to
from some other portion of floating-point code. This
command will not function if the W switch has been set
to off. If it doesn’t work, hit shift-W and try
again.
W Switch the on-off state of the floating-point dis-
assembler. If turned off, then the TO (Shift-4)
command will have no effect. If on, then every EF
(RST 28) will switch to the floating-point disassem-
bly and every 34H will switch off the floating-point
disassembly. If you have a stray EF on screen while
you are in an edit mode, you may get a messed up
display when you enter code. If so, exit (ENTER) from
edit mode. use this shift-W command, and go back into
the active mode without fear. Default state is ON.
Y Prints the screen. Useful for small routines. Gives
you headings and all. Consider using the same command
from an edit mode for no headings and variable length.
WRITE Mode Commands
A Switch to assembly-edit mode. Works only when dis-
assembly display and edit mode are on. Moves the
cursor horizontally.
AND LOAD from cursor to END. Works exactly like the HOT
Z-1 command. If you enter a tape name (no quotes),
then the tape is searched for a header with that name.
If no name is entered, then the first band on the tape
is loaded. The first byte after the tape name is
loaded to the cursor address and the rest follows.
Loading stops at the byte before END. if the tape
does not contain sufficient data to fill memory to
END, then the familiar “waiting” pattern comes up on
screen. You may BREAK from this command. BASIC tapes
begin at 4009H and will load from HOT Z if there is
space in memory.
D Display switch, data/disassembly. Works only from
hex-edit mode.
E Switch to hex-edit mode from assembly edit. Moves the
cursor horizontally.
EDIT Sets the Insert mode for the next instruction (only)
to be entered. If END is less than the cursor
address, then instructions are pushed to lower
addresses (up the screen) as far as END: if END is
greater than the cursor address, then instructions are
moved to higher addresses (down the screen) as far as
END. Any NAMEs assigned to shifted memory area will
also be shifted so that they stay with the instruction
to which they were assigned. Relative jumps to or
from the shifted area are not corrected and may
require a fix-up. If END is 256 bytes or more from
the cursor. address. you will be required to confirm
the END value before the operation proceeds.
ENTER Quit to READ mode when cursor is in “home” column.
During hex entry, ENTER escapes and leaves the
original memory contents intact. During mnemonics
entry, ENTER sends the line contents to the assembler
for entry into memory.
F Find the string marked by the cursor (first byte) and
END (last byte). Sets the display to start with the
found string. If no match is found, then the display
remains et the template string. To find the next
match without going back to the template, use
FUNCTION-F. Do not use other commands between
the F command and FUNCTION-F.
FUNCTION During mnemonics entry, escapes and leaves the
original memory contents intact. When cursor is in
the “home” column, FUNCTION changes the cursor to
inverse F and acts as a prefix to the FUNCTION
commands listed below.
G NAME command, This command has two separate effects,
depending upon whether it is used with the disassembly
display or the data display. With the disassembly
display, the effect is to christen that instruction
with the NAME that you enter to the screen following
the command. As with HOT Z-1, a NAME is four letters
with at least one beyond F in the alphabet.
With the data display, the NAME you enter following
the command must already be assigned to some address.
HOT Z then looks up the address for that NAME and
pokes that address to the byte at the cursor address
end the byte following. then moves the cursor down two
bytes. Use this form for entering tables of
addresses.
H Deletes the instruction at the cursor and closes up
the code between the cursor and END. END may be
either lower or higher than the cursor address. If
END is less than the cursor address, then code is
moved from lower addresses to close the spaces; if END
is greater than the cursor address, then code is move
from higher addresses to close the space. Code at the
END address and beyond (moving away from the cursor)
is preserved. If END is 256 or more bytes away from
the cursor, then you will be asked each time to verify
the END value before the command is executed. The
purpose of this is to prevent your messing up the
entire memory by forgetting to set END properly.
Q Does hex arithmetic. Takes the cursor address (K) and
END (E) and displays on the top line the sum (E+K) and
difference (E-K) in hexadecimal.
R Runs code beginning at the cursor address. Returns to
HOT Z with the first RET. If you do an extra FOF and
destroy the return address, then you are on your own.
(This command differs from the similar one in HOT 2-1,
which requires a JF back to HOT Z.) Recommended pro-
cedure is to test your routines first with the single-
stepper before attempting the R command.
S Single-steps the instruction at the cursor address and
switches to the single-step display with the result of
of that instruction in the register values and the
following instruction in the NEXT slot.
T Transfers code between the cursor address and END
(inclusive) to a destination (DEST) that you enter
following the command. ENTER after DEST executes the
Command: SPACE after DEST cancels the command: TO
(shift 4) after DEST lets you reset END before the
command is executed. Does not transfer NAMEs. To do
that, use the FUNCTION-6 command. which is otherwise
identical} to this one.
THEN (Shift 3) Deletes the NAME at the cursor address from
the current NAME file. This command will only affect
the NAME that you see on screen with the disassembly
display, so it is best not to use it with the data
display.
TO Brings up the END? cursor that allows you to reset the
END variable. Whenever a block of code needs to be
marked, it is generally delineated by the cursor
address and the address assigned to END. Always use
it to block out a segment of memory for Insert and
Delete commands before beginning to edit. END should
be set within 256 bytes of the cursor for editing. but
that restriction can be overridden in any particular
case. (See Insert and Delete instructions.)
W SAVEs code from cursor to END-1. Enter a tape name
without quotes. This is a data SAVE. If you want to
reload such tapes from BASIC, they must begin with a
proper set of system variables. (First byte loads to
4009H in BASIC.) If you load in a BASIC tape anywhere
in memory and change it judiciously, then SAVE the
same block with this command. you should be able to
reload the result from BASIC.
Y Outputs the screen without headings from the cursor
address to END to your ZX printer or Memotech I/F.
Will print slightly beyond END to fill out the screen
on which END occurs. A variant of the COPY command.
FUNCTION Commands: Hit FUNCTION first. then the second charac-
ter listed below. (F stands for FUNCTION. )
F-1 Clears memory from cursor address to END. Take care
not to erase HOT Z or your own programs.
F-2 Fills memory from cursor address to END with the code
for a key that you specify in response to the KEY?
prompt.
F-3 Moves RAMTOP to the cursor address and moves the
machine stack to the addresses just below. Be sure
there is enough clear memory in the new location
before moving the stack. (Turn on the SP display from
READ (AND key) and look at RAMTOP (4004-5): subtract
for the stack size and allow an extra 40 bytes for
stack excursions,)
F-4 Dead key.
F-6 Transfer memory contents and assigned NAMEs from a
memory block (cursor address to END, inclusive) to an
area beginning with an address entered in response to
the DEST prompt. (See shift T command. )
F-7 Readdress a jump table (address file) between the
cursor address and END by a 16-bit displacement value
entered in response to the DISP prompt. Takes the
address (lo-hi order) at each pair of memory locations,
adds the displacement, and re-enters the sum to the
same locations.
F-8 Relocates 78% code between the cursor address and END.
Readdresses all CALLS or JRs. Allows a three-way par-
tition of code, variables and (constant) files.
Requires nine addresses to be first entered at TEM1
through TEM9. See the special instruction sheet on
this command.
F-9 Initializes display window for single stepper. Set
the cursor to a block of 768 bytes of clear memory and
give this command. Then go to Single-Step mode and
use the shift-W switch to see the result of those
steps that put a character on the screen.
F-F Continues the search for the string specified in the F
command. Starts searching from the current cursor
position. (If, for example, you are searching for a
block of six empty spaces and you find a block of
nine, then you should move the cursor down four spaces
or more, so you don’t refind the last eight spaces,
then the last seven, etc., of the same block.) Uses
temporary variables that could be overwritten if you
stop in between for other operations.
SINGLE-STEP MODE
Key Function
AND Display breakpoints. Lists the current setting of the
two breakpoints on the line below the flags display.
EDIT Backs up. On its first use, this command takes the
instruction from the LAST slot at the top of the
disassembly listing and puts it in the NEXT slot
(second line). Repeated use with no intervening
commands will back up one more byte for each keypress.
Intended use is just to get the last step back.
ENTER Runs the instruction in the NEXT slot and reports the
resulting register values.
G Go (run) to breakpoint. Causes the test routine to run
from the address in the NEXT slot to either of the two
breakpoints, which must be set in advance of this
command. Breakpoints must be set to an address that
starts a command and not to a byte embedded in a
command. The GO routine checks the BREAK key after
executing each line of code, SO you can recover from
endless loops and sometimes from runaway routines (if
you’re quick) by hitting BREAK. If you are using the
window, it should be switched off for this command.
Q Quit single-step and return to READ. Return address
is the address in the NEXT slot of the single stepper.
Register values will be preserved if you reenter from
READ mode.
R Run a CALL or RST 18. It is your responsibility to
know that the called routine will not crash and not to
send RST 10 any unprintable characters. The purpose
of this command is to shorten the time needed to step
through complex routines.
S Set register value. The response to this command will
be REG? in the NEXT cursor. You should respond as
follows for the various registers:
             A for the A register
             B for the BC pair
             D for the DE pair
             F for the Flags register
             H for the HL pair
             S for the user's Stack Pointer
             X for the IX pointer
             Y for the IY pointer
(S) Note that all settings are 16 bits (two bytes) except
for the one hex byte for A and the mnemonic setting
for F. The specific flag bits are set or reset
with the same mnemonics as are reported (M, P, Z, NZ,
PO, PE. C, NC). Use this command to set up initial
conditions for testing your routines.
SPACE Skip the step in the NEXT slot and advance to the next
instruction. Skipped instructions are not listed in
the LAST slot at the top of the disassembly segment.
T Twin the breakpoints. Sets Breakpoint2 = Breakpoint1.
THEN Set Breakpoint2. Breakpoints are set just as register
pairs are, with a NAME or address entry into the NEXT
cursor. You must set the breakpoints precisely to the
beginning of the instruction at which you want the
single-step to stop, because the stop depends on the
address of the next step being exactly equal to the
breakpoint. If the breakpoint points to the second
byte of a two-or-three-byte instruction, you routine
will never stop until you crash or hit BREAK.
TO Set Breakpoint1. Breakpoints are set just as register
pairs are, with a NAME or address entry into the NEXT
cursor , You must set the breakpoints precisely to the
beginning of the instruction at which you want the
single-step to stop, because the stop depends on the
address of the next step being exactly equal to the
breakpoint. If the breakpoint points to the second
byte of a two-or-three-byte instruction, you routine
will never stop until you crash or hit BREAK.
W Window switch. Switches the optional full-screen
display after each step. The first time you hit
shift-W switches the display in, the second time
switches it out, etc. Before you use this command,
you must first have used the FUNCTION-9 command in
write mode to set up an alternate display file.
Y Print screen. Copies current screen to printer.
ON NAMES AND NAMING
HOT Z labelling or NAMing system is intended to make the
programs you are reading or writing more comprehensible when
they are listed. The four-letter limit is imposed by the
32-column ZX display. A space is not a legal character in a
HOT Z NAME, so use a dash or other punctuation if you want
fewer than four letters.
The NAMEs themselves and the addresses they assigned to are
contained in a special file. referred to as the NAME file. A
NAME file is an ordered list beginning with the highest
address to which a NAME is assigned (two bytes), then the four
letters of that NAME, then the next highest address, etc.
After the last NAME in a file. there must be two zero bytes.
HOT Z takes care of ordering the NAMEs for you.
A small NAME file is loaded every time HOT Z is loaded. and
that file contains four-letter abbreviations of the system
variables as well as HOT Z’s variables. You will find a few
extras in the crowd from 4000 to 407D. LINK, TADD, and ASIM
are used by the single stepper. TEM1 through TEM9 are slots
for temporary 16-bit variables for various HOT Z routines.
(You may use them for any of your own routines for values that
are not required once the routine is over, provided your
routine does not call the floating-point calculator.) HZET
(407B-C) holds HOT Z’s restart address for those cases when
you (or HOT Z) are using ROM routines and stumble into one of
the BASIC error traps.
The permanent NAME file that loads with HOT Z can be expanded
to hold any NAMEs you add in a session of using HOT Z, or you
have the option of starting a new file from scratch. In the
Standard 16 and 64K versions, the permanent NAME file is
located just above a large work area. and as you add NAMEs the
file expands downwards in memory (to lower addresses).
Add a NAME to the file with the shift-G command in WRITE mode
with a disassembly (not data) on screen. The command will
give you a cursor in the NAME column and allow you to enter
or replace the NAME for that address. A legal NAME is made up
of any four single non-inverse characters with the restriction
that at least one character must be beyond F in the alphabet.
If you forget that rule, HOT Z will refuse to accept your new
NAME and will ask you for another. A space in a NAME will be
accepted and the disassembler will list the NAME, but you will
not be able to use such NAMEs when working with the assembler,
which parses according to spaces and punctuation. Take care
that your NAMEs are unique, or HOT Z will always find only the
one at the higher address when you refer to it. (If you enter
a NAME to the ADDR cursor before you assign it, then the NAME
file will be searched and the display will move to that NAME
if it is already there; otherwise the display stays put.)
The THEN key (WRITE) will delete a NAME at the cursor address
from the screen and from the NAME file.
The shift-T command (READ) is there to let you find the start
Of your current NAME file. You may want to check up on it if
your are working under crowded memory conditions to be sure
the file doesn’t overwrite some valuable code. This command
switches the display to data and moves to the lowest address
of the NAME file. Since the NAME column in the data display
lists NAMEs assigned to addresses formed by pairs of bytes in
the hex column, the NAME appears horizontally across from the
first address byte and then vertically opposite the last four
data bytes. (Be aware that chance occurrences of data can
look like addresses and cause spurious listings in the NAME
column of the data display.)
You should also use the shift-T command when it comes time to
SAVE the NAMEs you have entered in a session. However, you
will also need to know the end address of your file in order
to SAVE it. You can call up that end address by entering NEND
io the ADDR cursor; the end address of the NAME file is listed
lo-hi there. You can either add 2 to that address to include
the two zero bytes that act as a terminator, or you can
remember to zero those two bytes after you reload the tape.
If you choose the first option, hit shift-T, turn on the
edit cursor, set END to NEND+2, and SAVE. Record the
addresses for use when you reload.
When you reload a NAME file, you must install the start and
end addresses so that HOT Z will know where to look for that
file. This is done at the six-byte block labelled ALNA
(alternate NAMEs) in the permanent NAME file. With the data
display and the edit mode, write the start address twice
(1o-hi) followed by the NEND address: don’t forget to subtract
2 if you have included the terminating zeroes. (If you have
not included them, make sure they are there first.) If
you don’t do these settings correctly, you will hang up the
program when you try to switch the new file on.
The NAME-file switch command is shift-H in READ. It will
switch from the permanent NAME file to the one you have
loaded. after you have installed the file parameters at ALNA.
If you use shift-H without installing the new parameters, the
effect will be to switch off the NAMEs entirely and you will
not be able to add new ones.
You can amalgamate NAME files only if they pertain to separate
blocks of memory, with the addresses in one block all higher
than those in the other. Then just load the two files end to
end in the proper order and save them as a single file.
HOT Z NAMES IN PERMANENT FILE
AFEX 7FD0 Store for AF’ register pair in single-stepper
BERG 7FDC Store for AF register pair in single-stepper
ALNA 7FF0 Alternate NAME file descriptors. Six bytes.
ASIM 4076 Single-step simulation area. Five bytes.
BCEX 7FCE Store for BC’ register pair in single-stepper
BCRG 7FDA Store for BC register pair in single-stepper
BPT2 7FBC Breakpoint #1 address
BPT2 7FBE Breakpoint #2 address
CADR 7FFE Current address for disassembly
CBFL 7FF5 Flag for a bit-op prefix (CB)
CHOO 6AB9 Selects and updates Read mode display
COUN 7FB6 Counter for printing register values
DEEX 7FCC Store for DE” register pair in single-stepper
DERG 7FD8 Store for DE register pair in single-stepper
EDDQ 7FF4 Flag for ED prefix
EOPA 7FEA The END address
FCBQ 7FF3 Flag for prefixed bit ops
FENS 7F9E Single-step window switch: holds CRUN if off
FILC 7FB4 Fill character, normally zero for screen clear
HLEX 7FCA Store for HL’ register pair in single-stepper
HLRG 7FD6 Store for HL register pair in single-stepper
IXRG 7FD4 Store for IX register pair in single-stepper
IYRG 7FD2 Store for IY register pair in single-stepper
KADD 7FFE Address pointed to by the cursor
KEYB 737E Gets code of keystroke into A: preserves other
KLIN 7FF2 Line number with cursor
KPOS 7FF0 Screen address of the cursor
KRED 7DE3 Puts cursor address into HL and KADD
LENI 7FE6 Length of current instruction in disassembly
LFPO 7FB0 Stores address for floating-point interpreter
LOSI 7FC4 Last one-step instruction
NADD 7FFC Next address for disassembly
NASW 7FF8 Switch for NAME lookup
NEND 7FFA End of NAME list
NOSI 7FC6 Next one-step instruction
NTOP 7FF6 Most recent leading (low) address of NAME file
OSDF 7FC2 One-step display file for extra window
OSDF 7FC0 one-step—display point for window, as DFCF
OVER 7EF0 Overflow warning for User’s stack
7F82
POIN 7FBA Pointer used in building register-value display
PRIM 7FBB Space or prime for register display
SPBI 7FDE Stack-pointer storage bin for stack switches
UNDR 7F98 Underflow warning for User’s stack
7F9C
USRS 7FCB Single-step user’s stack pointer. Sets with S.
NOTE: The high byte of variables for the 64K version
is FE rather than 7F. Low byte is the same.
All other addresses are identical.
THE BIG REM
There is a REM generating program that was published in
a back issue of SYNTAX, and those of you who have it may want
to install it and use that to create a BASIC line to hold your
machine code routines. However, you may find the following
approach more instructive on how to manipulate BASIC from the
machine level. We have taped Big REM and included it after
the 16K version of HOT Z on your master tape. Big REM fills
all of the available workspace in a 16K memory.
Big REM can be used with either version of HOT Z-II, although
it can only be joined together on a single tape with the 16K
version. First LOAD HOT Z. You can LOAD Big REM without
exiting HOT Z by setting END to 4DC0, putting the cursor at
4009, and giving the LOAD command. You can also exit HOT Z
with the Q command, LOAD Big REM from BASIC, and return to HOT
Z with the appropriate RAND USR command. One thing you cannot
do (with 16K) after loading Big REM is to add BASIC lines in
the conventional way, because your memory is essentially full
and you will start overwriting parts of the HOT Z files.
With Big REM loaded, you can start writing your machine-code
routines at 4082, which contains the character zero (1C) as a
marker. as does the last usable byte (4AA4). When you finish.
then you will want to cut off the REM statement so that your
code just fits. The necessary information to do that is
contained in the chapter on BASIC line formats in your BASIC
manual. If you look at 407D and following with Big REM
loaded, you will see the line number in high-low order (0001H)
end then the line length in low-high order in addresses
407F-80, That length is 0A25H, If you add that value to the
next address, 4081 (the address of the token for REM (EA))
then the sum equals the location of the display file (0A25 +
4081 = 4AA6).
You should use this relationship to “clip off” the BASIC REM
with your routine in it. If, for example, your last byte of
code is at address 4400, then you will need a line ending
(76H) at 4401, and a line number at 4402 and 4403. If you
want that line number to be a 2, then put 00 at 4402 and 02 at
- (For higher line numbers, remember that this is a hex
value, not decimal.) Now you need a line length at 4484-5 and
e REM token (EA) at 4496. The line length will be the
difference between this address (4406) and the display file
address (4AA6 – 4006 = 06A0). so put the low byte (A0) into
4404 and the high byte (06) into 4405. That will create a
second BASIC lines however, the first line is still specified
as being the full length, so you must go back and change the
length of the first line.
In this case, the line length plus the address of the first
token (here REM) must sum to the address of the first byte of
the next line number, which is 4402 in our example. Since
4402 – 4081 = 03B1, put B1 in 407F and 03 in 4080. You can
now switch into BASIC with the Q command and delete line 2 in
the normal way, then SAVE line 1 for later merging with your
BASIC program.
Using HOT Z NAMEs with Big REM requires one of two approaches.
You could start by shortening the REM statement before you
write your code in order to leave room for the resident NAME
list to expand. Just clip off a suitable portion as described
above and come beck to HOT Z with the USR call. A more
convenient approach would probably be to locate the NAME file
for your routine et the high end of the big REM statement.
(See the notes on NAMEs and Naming.)
You can do that by just writing the address 4AA2 into the
three address slots at ALNA, then using the H command (Read)
to switch to the empty NAME file. Or you might want to
transfer all or part of the permanent list into the REM before
you do the switch. (Re careful not to transfer over the end
of the REM statement. which would destroy the line end and the
beginning of the display file.)
if you put the NAMEs for your routine in the top of the REM,
then after you split the REM you will have your routine in
line 1 and the NAMEs in line 2. You should then SAVE both
lines as & working copy for future revisions, then delete the
second line end SAVE again for merging with a BASIC program.
Combining Big REM and the 16K HOT Z
You can combine the 16K version with Big REM so that they LOAD
as a single program. LOAD the two programs as described
above. Write an 80H at 7F1F to indicate the end of a
variables area, then go to the systems variables area and
charge ELINE, STKBOT, and STKEND so that each holds 7F20
(low-high order !). Then SAVE the whole thing from BASIC.
When you reLOAD, you will have to start HOT Z with a direct
RAND USR call. You cannot write any BASIC or declare any
BASIC variables with this version, and you should decouple the
two parts after starting HOT Z by restoring ELINE, STKBOT, and
STKEND io hold 4DCO. What this linking does is to make HOT Z
look like the variables area of a BASIC program.
If you own Z-TOOLS co a comparable utility program. you can
merge the 1 REM’s created in this wav with BASIC programs that
lack a line 1.
If you are not using Big REM, or if you have completed the
line-chopping described above, and want to write a BASIC
program of some size with HOT Z still resident, then you
should move RAMTOP and the stack below HOT Z before you use
shift-Q to go off and write BASIC. In 64K, put RAMTOP below
5800H to protect HOT Z; in 16K, put it below 4E00.
USING THE RELOCATE COMMANDS (F-8,F-9)
The Relocate command is rather complex in order to provide you
a degree of flexibility in relocating your routines. A set of
nine addresses must be entered before using the F-8 command,
and a certain amount of planning and knowledge of the subject
program is required to derive the correct addresses. Simple
programs with one or two calls or absolute jumps are best
labelled, moved with the Transfer-with-NAMEs (F-6) command,
and then fixed up by hand.
A program of reasonable complexity will have a block of code,
a block of data (which may include address lists or jump
tables), and a block of variables. Good programming form
would recommend that you keep these blocks separate and
distinct rather than, say, mingle data and variable storage
in the crannies between your subroutines. If you are
programming with HOT Z, you can separate the blocks generously
as you develop your program and then use the Relocate command
to close the gaps when you finish. Separation of code and
data also allows you to make efficient use of the ZX memory
architecture, since there is generally some block of memory
that can be used far data or variables but not to run code.
(Above 8000H in unmodified machines. above C000H with the
Oliqer modification and the standard screen driver.) So don’t
clutter up you active memory with data files if you have more
than l6K of RAM.
HOT Z’s Relocate command will work on program blocks where
code, data and variables are separate and distinct. If you
have embedded patches of data, the command may still work, but
you should check the data after the relocation to make sure
that it has not been changed under the guise of readdressing
code. Programs such as the 8K ROM, where jump tables lie
around like empty beer cans, would have to be broken up into
segments and relocated piecemeal.
The Relocate routine readdresses and moves Z80 code. However,
the command does not take account of overlapping segments
between source and destination blocks. so you cannot directly
relocate a program to addresses already occupied by that
program. (In such cases, you should use the transfer command
first and then readdress in place with the relocate command.)
Jump tables have to be revised with the F-7 command, which
first asks you for a displacement and then adds that
displacement to each address in the file, starting at the
cursor and ending at the END address. (If you moved your code
from 4100H to 4400H then the displacement would be 0300H: from
4400H to 4100H would be a displacement of FD00H.) Jump tables
end data blocks should be moved with the Transfer command
prior to using the relocate command.
The F-8 command (Relocate) allows you to move the code block
by one displacement, the data block by another, and the
variables block by a third displacement. (Any other three-way
separation should also work.)
ADDRESS ENTRY FOR RELOCATING
The variables TEM1 through TEM9 are used to set the nine
address parameters for relocation. The nine addresses are
three sets of three addresses. Each set of three addresses
indicates the start and end of an address range to be changed
and the start address of the new address range. For example,
suppose your program to be relocated fit the following memory
map:
             44D0-44EB Variables
             44F0-44FF Data
             4500-4680 Program
Suppose you heave 32K and want to put the variables and data
at 8100H and the program at 4C40. First. transfer the
variables block to 8100H: it will run to 8118, so transfer the
data block to 8119-8128. You want to move the program from
4500 up to 4C40, so any addresses of jumps or calls that lie
between 4500 and 4680 should be changed to lie between 4C40
and 4DC0. (You don’t need that last number.) So enter the
original range in TEM1 and TEM2 and the first address of the
new block in TEM3, thus:
            TEM1 4500
            TEM2 4680
            TEM3 4C40
These first three TEM values always hold the parameters
relating to the program (code) block. Variables and data
parameters can go interchangeably into TEM4-TEM6 or TEM7-TEM9.
Addresses of variables, which were at 44D0-44E8. must be
changed to start at 8100, and addresses of data, formerly at
44F0—44FF, must be changed to begin at 8119, so fill in the
remaining TEM slots as follows:
    Variables                       Data
    TEM4 44D0                       TEM7 44F0
    TEM5 44EB                       TEM8 44FF
    TEM6 8100                       TEM9 8119
TEM4-6 are one block, TEM7-9 the other. Now set the cursor at
4500 (start of the code segment) and set END to 4680, then
give the FUNCTION-8 command. The code will be copied to the
new location and readdressed to run with the new variables,
new data block, and any relocated subroutines in the code
block. The original code will remain unchanged at its
original location.
You may also use the Relocate command to split a code block
into two or more separate blocks, but you must apply it
repeatedly. once for each of the end-product blocks, and
readdress for the blocks that are not being moved as if those
blocks were variables or data.
If you lack variables or data blocks, then use a single
non-zero dummy value for all three of the second or third set
of TEM values, i.e., make them all three the same.
The relocator leaves unchanged any ROM calls or any loads to
or from the systems variables area (4000-407C).
RELOCATING HOT Z
In 1óK
Relocating the program that does the relocating is a special
case of using the Relocate command. Lack of space in 16K
prevents any useful relocation of the entire program. You
could, however, clear away some of high RAM by moving the
part of HOT Z that occupy those addresses into the work space
below 4E00. This would allow you to write and debug a routine
intended to run above RAMTOP with a BASIC program.
To do that. begin by moving the stack with the FUNCTION-2
command. Set the cursor to 4D80 and give the command. (There
will be no visible on-screen effect unless you have set the SP
display (shift-2 in READ)). Next move the HOT Z variables,
which occupy 7FB0-7FFF, by using the Transfer-with-NAMEs
command (FUNCTION-6). Set the cursor to 7F80, set END to 7FFF
and give the command, followed by 4D80 as DEST. This copies
the variables to 4D89-4DFF, but it does not yet readdress the
HOT Z code to use variables at the new location. To do that,
set the following TEM values:
     Code               Data           Variables
     TEM1 5800,     TEM4 4400,       TEM7 7FB0
     TEM2 7EFF,     TEM5 4400,       TEM8 7FFF
     TEM3 5800,     TEM6 4400,       TEM9 4D80
The data entries are dummy values intended to have no effect,
since the data tables stay put. Finally, set the cursor to
5800, set END to 7F20 and give the FUNCTION-8 command. After
that. you may clear 7F20-7FFF with the FUNCTION-0 command and
use it as workspace.
If you are more ambitious still and hungry for high memory, it is possible to move a part of HOT Z from the high addresses to your low workspace, (If not, skip the next few paragraphs.) You need to pick a point in the code across which there are no relative jumps: 7870 is one such. Since this is not a simple relocation but a splitting up of the program. several extra steps are necessary. Assuming you have already moved stack and variables, as described above, first relocate the code from 7870-7F20 to 4670. Next. we will readdress code left behind (5800-786F) to send its calls and jumps to the transferred block: finally, a small fix to the jump tables is necessary.
For the initial relocation, set the following TEM values:
    TEM1    7870,   TEM4    4400,   TEM7    4400
    TEM2    7F20,   TEM5    4400,   TEM8    4400
    TEM3    4670,   TEM6    4400,   TEM9    4400
Sei the cursor to 5800, END to 786F, and give the FUNCTION-8
command. The first column leaves the original code in place
and produces a relocated and readdressed version at the new
location (4670-4D20). The remaining columns hold dummy values
and produce No effect. The original section of the code will
still make its calls and jumps to 7870 and above, so it is
necessary to readdress that block too.
Again, set the TEM values:
    TEM1    5800,   TEM4   4400,    TEM7    7870
    TEM2    786F,   TEMS   4400,    TEM8    7F20
    TEM3    5800,   TEM6   4400,    TEM9    4670
Set the cursor to 5800, END to 786F and give the FUNCTION-8
command. The first column leaves the code in place and the
third changes any references to the high addresses to the new
code block. The jump tables still contain a pair of
references to the moved code, however. Change the two 78’s at
50EB and 50ED to 46’s. (1f you moved a bigger chunk, you
would have to search through the jump tables and change each
reference to the moved block.) Now you can clear memory from
7870 to 7FFF and use that as work space.
Since the above relocation hems in the NAME file, you must
either forego using labels or relocate the NAME file into your
new workspace, which is relatively simple.
Larger Memories
If you should expand your RAM or install one of the
modifications that allow you to program parts of high RAM,
then the following relocations may be useful.
From 16K to 32K (unmodified computer): This case allows you
to move files and variables to high RAM, but the program must
still be located below 8000H in order to run. The files of
the l6K version are located at 5048-57FF; let’s move them to
B748-BEFF, leaving BF00-BFFF for variables, which are
currently at 7F00-7FFF. Set the following TEM values:
- 35 –
Code Data Variables TEM1 5800, TEM4 504B, TEM7 7F70 TEM2 7EFF, TEM5 57FF, TEM8 7FFF TEM3 5800, TEM6 B748, TEM9 BF00
It is important first to copy the files and variables up to
their new locations. so first transfer the data and variables
blocks to their respective new locations, leaving the old
copies temporarily intact. Transfer the variables
(7F00-7FFF) first, using the Transfer-with-NAMEs command
(FUNCTION-6). This will change the NAME file for the new
version. Then use the shift-T command to get to the start of
the NAME file (4E0C). Turn on the cursor, set END to S7FF,
and transfer to B50C. (That puts 504B into B748, etc.)
Now set the cursor to 5B80, set END to 7EFF, and give the
FUNCTION-8 command. After the return from that command, you
may erase the original data and variables areas for your own
use.
This relocation requires no readdressing of jump tables
because the code is left in place, but there is one
small block of single-step code which is embedded in the data
end copied out whenever the single-stepper is used. This
block originates et 570F-572B and will have to be readdressed
by hand if the code block had been moved. Details of this fix
are in the next example.
There is just one change to be made in the data section to
initialize to the new NAME file location on loading or
restarting. The initial file location is set from the six
bytes at BEF4 and following. Change BEF5 and BEF7 from 4E to
B6 and BEF9 from 50 to B7.
Having done this readdressing. it is useful to make yourself a
loader, so that you can load in the new version directly and
don’t have to relocate every time. The easiest way to make a
loader is to modify the existing one by loading the entire HOT
Z-II tape into memory and modifying it. For the example
relocation., you can load the HOT Z-II tape as a data tape from
8009H to B4E5. The code that loads HOT Z to the proper
addresses will be at 83AB and will have to be modified.
First, however, the readdressed program segment from 5800 to
7EFF should be copied into the loader with the transfer
command. Set the cursor and END to these two addresses and
transfer to 8DC4. Next, set the cursor to B50C and END to
BEFF and transfer to 83D0. This moves the files into place.
Now modify the code at 83AB to read as follows:
            LD HL,43D0
            LD DE,B50C
            LD BC,09F4
            LDIR
            LD HL,74E3
            LD DE,7F1F
            LD BC,2720
            LDDR
            CALL 0F23
            JR 403C
1f you use the insert command (EDIT) before each of the first
four instructions, you can preserve and use what is already
there, but change the LD BC to 2720.
Ready at last. SAVE from 8009 to B4E5 and the resulting tape
should load normally and initialize the relocated version.
One of the hazards of loading a large program such as this is
the possibility of writing over the machine stack when you
copy up the program. In this case, the stack is in the
eventual workspace (7F00-7FFF) and is safe. However, if you
engage in non-standard addressing or have a revised ROM in
your machine, then be sure the stack is in a sate place before
loading HOT Z.
Moving HOT Z to High RAM
If you have a suitable memory for the project (Oliger or
Memotech or possibly another: not a Byte-Back M-64 or a Super
Z.) and make the Oliger modification to your computer (See SQ
v2.n2.), you can run machine code in the 32-48K block
(8000H-BFFF), or if you have a separate display board, you may
be able to use the entire 64K for programs. In that case, you
should convert HOT Z to run entirely in another block of
memory. Here’s how to move the 64K version to 9B00H, keeping
the variables and files in the top 16K of a 64K memory.
(You ought to test your modification first by using HOT Z to
write a simple little routine like CALL 0A2A, CALL 737E, RET
somewhere in the newly opened-up memory area. This just
clears the screen, waits for a keystroke, and comes back to
HOT Z. but you can’t normally run it at, say, 8100H. Set the
cursor to the first instruction and give the shift-R command
to Run it. If it doesn’t work, then either your mod is
incorrect or your memory has some prevent circuit in it.)
Load the 64K version. Set the following TEM variables:
        Code           Data           Variables
     TEM1   5B00,   TEM4 5000,      TEM7    5000
     TEM2   7F1F,   TEM5 5000,      TEM8    5000
     TEM3   9800,   TEM6 5000,      TEM9    5000
This will cause the program code to be rewritten at 9800 and
following addresses with all calls and jumps readjusted but
with the same variable and file addresses. (Values in TEM4
through TEM5 are dummy values that prevent anything from
happening. Use any one non-zero value for these, but keep
them all the same.)
Set the cursor to 5800 and END to 7F1F and give the FUNCTION-8
command. If you have done things correctly to here, you will
find the readdressed program beginning at 9800. Don’t try to
run it yet. Unlike the earlier example, the jump tables must
be readdressed because the program itself has been moved.
The jump tables for the standard 64K version begin at F648 and
end at F76D. Since both copies of the program ere in memory,
vou can just readdress the labels in place. Use the
FUNCTION-7 COMMAND to change the jump tables. (Cursor at
F648, set END to F76D, hit FUNCTION, then 7, set DISP to 4000,
because the move from 5800 to 9800 is a displacement by that
amount, ENTER.) Now check the address at F754 and change it
back io 4076; since that address is in the systems variables
area, it does not change.
At this point, you are running commands in one version and
control in the other, Now switch to the new version by
setting the cursor to 9800 and giving the shift-R (Run)
command. That should bring up the 0000 address as the program
restarts in the new version.
The single-stepper requires one more set of changes. There is
e small patch of code embedded in the data section that is
copied out for single stepping. You will find it at FD0E to
FD2B (FD2C isn’t!) There are seven JP’s and one CALL in that
area. It is generally quicker to revise those eight addresses
than to use the FUNCTION-8 command, though you could use it by
setting TEM1 = FD0E, 2 = FD2B, 3 = FD0E, 4 = 5800, 5 = 7F1F,
6 = 9800, and the other three with a dummy, say 5000. If you
revise the addresses by hand, just add 4000 to each.
Don’t change the JR. (The new addresses will all begin
with either A9 or AA.) You should now have a fully converted
version that runs in the 32-48K block of your modified
computer’s memory.
To make a loader for this new version, load in the original
tape from 4409 to 794F. (You may first want to erase the old
version at .5800-7F20 with the FUNCTION-0 command.) Now all
you have to do is to copy the various blocks into the
appropriate spots in the loader, change a few loading
addresses, and resave the same block to make a loadable tape.
(Addresses 4409-447C will contain the system variables that
normally load to 4009-407C.)
At 47Bó, change the LD DE,7F1F to LD DE,BF1F. That will load
the program to its new memory residence. At 443F, change the
CALL 737E to CALL B37E. That calls the relocated keyboard
scan while the cover is on screen. At 4442. change the LD
BC,146B to LD BC,3B6B. That clears away the loader after it
has done its job. Change the JP at 444F to JP 9900. That
starts the program.
Now set the cursor at 9800, END to BF1F, and Transfer
(shift-T) to 47D0. Next. cursor at F3A0, END set to FDFE, and
Transfer to 6F00. If you want to change the version number
end memory-occupation listing on the cover, look at 466F and
following with the data display and make the changes in the
Edit mode. Finally. record over the initial address space
(4409-794F). The resulting tape should load from BASIC,
install HOT Z, and jump to the cover, just as your original
version does.
THE ONE-STEP WINDOW
The Single-Step display. window requires a second full display
file for the cumulative screen print of the routine you are
stepping through. Since such a display file takes up 768
bytes of memory that you might otherwise use for programming,
the program requires you to specify where you want to put the
second display file. Such a file can be anywhere in memory
since it is moved into the proper location at each step. Just
assure that the following 768 bytes contain nothing you want
to keep. Then set a cursor to the start of this area and give
the FUuUNCTION-9 command to initialize the file and hook the
window into the single-step routine.
After you have initialized the second display file. you can
switch the single-step display window in or out with the shift
kd command ingle-Step). If the window is “on”, the screen
will come up with a pause tor a keystroke at every step.
Since only a few steps will actually print to the screen, you
may want to keep the window off and refer to it only
occasionally. Restart HOT Z (shift R in READ) to get rid of
the window entirely and reclaim the memory space.
The window will normally flash on screen for each step, but
there will be no pause unless you first give the W command,
then hit ENTER to run a step. Any key will take you back to
the register display, but note that the V key is also a CLS
command for your window display. A CLS puts the print
position back to the top left screen corner.
If you use RST 18 to print to the display window, you can run
the whole RST 10 routine in the same way you would a CALL to a
subroutine, by hitting shift-R in single-step mode.
NOTES ON MAKING EPROMS
At the moment, the only possibility of putting HOT Z-II on
EPROM is to use two 2764’s (or a 27128) or the equivalent with
some kind of modified memory system. This means you will have
Some extra space for your own routines as well, and you may
want to hook up some of them to HOT Z.
The commend lists have two kinds of user-slots for extra
commands, marked as “Dead keys” and “User hookups”. If you
work entirely in RAM, then treat both categories as equal.
Just replace the current address in that jump-table slot with
the address of the routine you want to run as a command for
the corresponding key.
If you make your own EFROMs of HOT Z, then you have to treat
Dead keys and User Hookups as quite separate opportunities.
Dead keys will be truly dead in EFROM unless you enter an
address before you burn an EFROM. If you have space for your
favorite routines on the same EPROM with part of HOT Z, then
you should book up those addresses before you burn the
EPROM. User hookups are still available atter you burn the
EPROM because they allow you to hook in routines you have just
written into address slots in the variables area. Addresses
for these slots ere listed on the command sheets. it is often
handy to look new routines of any sort into HOT Z and to run
them as commands.
Most available slots have been left among the Write commands
because those commands allow the greatest flexibility. If you
want to add to that flexibility, write your own command
processor and make the entry into that a HOT Z command. That
is roughly how HOT Z ties together the Read command mode with
the Write modes and the single-step. I use a jump table for
all command-processing loops and advise anyone using HOT Z to
take the same approach because there is a lot there that you
can borrow. (For example, a CALL to this versions KEYBoard
routing will preserve all register values except for the
accumulator, which comes back with the code of the first key
pressed. It does use the EXX registers.)
With a Write command. you should have the cursor address
available to you as well as the END address. The END address
is always available by loading from the HOT Z variable E0FA.
which is included in the permanent NAME list. The cursor
address should be read at the start of a routine with a CALL
ERED (cursor-address read), which brings back the cursor
address in HL and updates it in the HOT Z variable KADD.
(cursor address). ERED is the address in the first CALL for
the H kev routine. tor example, which is listed on your
Command Sheet, KRED puts the cursor address in HL and into
the HOT Z variable KADD.
If you have a routine that you want to make into a Write
command. then you should decide what mode of HOT Z you want to
return to. even if only eventually. A routine that ends in a
RET must not destroy the existing screen, or it will have no
context to return to. (It will come back, though, to an
anonymous address and in Write mode but with no cursor, at
which point you should press ENTER.) If you want to use the
screen then you should choose to return to Read mode, which is
the “home base” of HOT Z. To do that, you should POP the
first RETurn address and dispose of it, then load HL with the
address CHOO and do an EX (SP),HL. If you do that, you can
even control the address to which the HOT Z display returns by
loading CADR before you RETurn.
In other words, if you want to use the screen, and to know the
address et which the command was issued. prefix your routines
with:
            POP HL
            LD HL. CHOO
            EX (SP),HL
and end them with a RET.
Commands that do not use the screen can restore the cursor
position with a CALL KRES. You can move the cursor one line
down with CALL KDWN or move it up with CALL K-UP, either just
before the RET.
Commands appended io the single step may need to use the
address in the NEXT slot, which is stored in the variable NOSI
(next one-step instruction).
THE FLOATING-FOINT INTERPRETER
RST 28H is the entry into the ROM’s floating-point operations,
which are coded in the bytes between an RST 28 and the
following 34H. There is a good explanation of this second
language (Or is it third?) of the ZX in Dr Logan’s article in
SYNC 2.2. (But beware of the two sign tests, which aren’t
jumps, as labelled in SYNC.)
HOT Z will read this floating-point language, but only after
you turn on the floating-point interpreter (shift-W in READ).
If you leave the floating-point interpreter turned on, you
will get a true reading of the ROM, but problems can arise
elsewhere in memory when you encounter an EF that functions as
date rather than an RST 28. You may get locked into the
floating-point interpreter mode, without a 34H. the END
Character, in sight. The way out from this barrage of
gibberish is the shift-W command again, which switches out the
floating-point interpreter entirely. Other times you may want
to read it, because this extra language is really one of the
treats of the Sinclair-calculator heritage.
The f-p interpreter is also turned off by entry of a numerical
address, but not by a page flip or a NAME, so use the last two
when you’re working with f-p. In addition, there is a special
key command, TO in READ mode, which switches the flag that
tells the disassembler which language it’s in.
The TO command (READ) has a dual purpose. It will get you out
of floating-point mode (without turning off the interpreter)
if you need to and can’t, or it will get you in when you want
to be but aren’t. You may get stuck in that mode through
addressing yourself into the middle of a Z80 instruction, for
example. Since floating-point operations include jumps and
loops, there are also inclusions of f-p code that do not begin
with am RST 28, branches of jumps. The TO command will get
you into those branches. However, the command is just a bit
switch and it doesn’t function when the screen page itself
switches from one language at the top to the other at the
bottom. The cure, when the TO command doesn’t function is the
cute trick of hitting the shift-D key twice. This picks up
the language mode from the bottom of the page to the top and
reverses the reading of any bytes from one language to the
other.
You will also encounter some queer behavior if there is f-p
code at the bottom of the screen and you try to write or go to
the One-Step. This is not generally fatal and can be cured by
going back to disassembly and setting the screen so that it
ends in Z80 disassembly. If you want to write f-p code, the
only manageable way is to go into EDIT mode (shift-E).
Another consequence of jumps in the f-p language is that an
RST 28 may be embedded in a run of f-p language as a second
entry point. In these cases, EF gets misread as GET F, which
is a particle of nonsense, but it really is an RST 28. and
would reed as such if you called it by address to the top of
the screen.
Floating-point operations are FORTH-like stack manipulations
and easy to follow if you know something about that language.
They use the MEM area of the systems variables as storage
slots for six floating-point numbers. (Each is five bytes.)
The f-p operations that transfer between the calculator stack
and MEM are called GET and STOR and are followed by a single
digit from 0 to 5 to indicate the slot used. Numbers or
letters higher than 5 generally indicate a patch of nonsense
with GET, STOR and STAK as well.
Many of the possible f-p operators do not occur in the coding
of the ROM, where you are likely to encounter them with HOT Z.
They occur instead during the ROM’s reading of BASIC programs,
and they ere generally identical with a BASIC instruction.
You could learn to write floating-point code with these and
the purely machine-code f-p operators if you wanted to; it
would be similar to BASIC and a little faster. The ‘entry
point’ of these BASIC f-p operators into the real machine
world is through the operation labelled RAFF (Run A as
Floating-Point). However, you need only use the command
numbers listed as the first column of the instruction list to
perform those BASIC functions on whatever floating-point
numbers are on the calculator stack. From the perspective of
a HOT Z user, RAFF would be used only to run an operation that
resulted from some calculation, whose result was a code in A.
Two of the f-p operations deliver data directly from the code
listing to the calculator stack. They generally do this in an
efficient way, using fewer than five bytes, if possible, to
encode the five-byte floating-point number. HOT Z prints the
encoded floating-point number in the NAME and mnemonics
columns of the disassembly listing. Since the interpreter
doesn’t know where any number will end, it is necessary to
begin all of them slightly out of column, or the longest would
poke out the line-ends in the display file. The f-p
interpreter also reads the full five hex bytes that go onto
the f-p stack, rather than the condensed version that actually
occur in the ROM. The ADDR column keeps accurate track, and
you can work out the extra bytes, which are generally trailing
zeroes, from that column.
HOT Z prints floating-point data by using the same ROM
routines that handle that data, so the disassembly slows down
and becomes jerky when it has to print those huge numbers, or
their single-digit versions.
The two data-stacking operations are labelled STFP (stack
floating point) and SAPP (successive approximator: we’ve ail
met one). The first of these puts one five-byte number on the
calculator stack, the second a series of one to 31 (whatever
is left when you AND the low nibble of the instruction byte
with 0F) five-byte f-p constants. (That’s 5 to 155 bytes.)
When either of these operations gets stuck near the bottom of
the screen without enough space to display all its floating
points, then that same operation will begin again after the
next page flip (F command) and boringly redisplay its whole
repertorv of numbers. The successive approximator in the ROM
uses anything from six to a dozen floating point constants to
get to a value for Chebyshev polynomials to approximate the
transcendental BASIC functions.
FLOATING FOINT OPERATIONS
Code Op Addr Description
00 JRT 1C2F Jumps if stack top holds a true
01 SWOP 1A72 Exchanges the top and second 5-bvte stack entry
02 DROP 19E3 Throws away top stack entry
03 SUB 174C Subtracts top stack from second stack entry
04 MULT 17C6 Multiplies top two stack entries and leaves product on stack
05 DIV 1882 Divides second entry by top stack and leaves quotient on stack
06 PWR 1DE2 Raises 2nd on stack to power of stack top
07 OR 1AED Performs BASIC OR on two top stack entries and leaves result
08 AND 1AF3 Performs BASIC AND on two top stack entries. leaves result
09 N<=M 1B03 Numeric inequality test 0A N>=M 1B03 Numeric inequality test
0B N<>M 1B03 Numeric inequality test
0C N>M 1B03 Numeric inequality test
0D N= 1B03 String inequality test
13 $<> 1B03 String inequality test
14 $> 1B03 String inequality test
15 $< 1B03 String inequality test
16 $= 1B03 String equality test
17 $TR+ 1B62 Concatenates the strings addressed by the two top stack entries
18 NEG 1AA0 Changes the sign of top stack entry
19 CODE 1C06 Replaces top stack entry with its Sinclair CODE
1A VAL 1BA4 BASIC function
1B LEN 1C11 BASIC function
1C SIN 1D49 BASIC function
1D COS 1D3E BASIC function
1E TAN 1D6E BASIC function
1F ASN 1DC4 BASIC function
20 ACS 1DD4 BASIC function
21 ATN 1D76 BASIC function
22 LN 1CA9 BASIC function
23 EXP 1C5B BASIC function
24 INT 1C46 BASIC function
25 SQR 1DDB BASIC function
26 SGN 1AAF BASIC function
27 ABS 1AAA BASIC function
28 PEEK 1ABE BASIC function
29 USR 1AC5 BASIC function
2A STR$ 1BD5 BASIC function
2B CHR$ 1B8F BASIC function
2C NOT 1AD5 BASIC function
2D DUP 19F6 Duplicates top of stack (5 bytes)
2E QREM 1937 Replaces number pair with quotient on stack top, remainder below
2F JRU 1D23 Unconditional relative jump
30 STFP 19FD Composes and stacks number from following data bytes
31 LONZ 1C17 Loop jump as DJNZ with BERG as counter
32 N<00 1ADB Tests sign of stack top and replaces with true if negative 33 N>00 1ACE Tests sign of stack top and replaces with true if positive
34 END 002B Ends and RST 28 routine
35 ADDJ 1D18 Adjusts angle values modulo 2 pi for trig functions
36 ROUN 1BE4 Rounds down to integer
37 RAFP 19E4 Uses byte in A as f-p op code and runs it; for BASIC functions
38 DEXP 155A Decimal exponent processor
BA SAPP 1A7F Successive approximator; stacks and processes constants
A0 STAK 1A51 Stacks 0.1,0.5,PI/2,or 10 depending on 2nd nibble
C0 STOR 1A63 Recalls stored entry from calculator MEM slot in 2nd nibble
E0 GET 1A45 Stores entry in calculator MEM slot given by 2nd nibble
READ Mode Command File
File Key Routine Function
(64K) (16K) (Shift)
F65E 505E A 7E30 Turn on assembly editor
F64C 504C AND 63DE Stack pointer display switch
F660 5060 D 6A74 Switch to data display
F65B 5058 E 60C5 Switch to edit
F662 5062 F 63C4 Fix display file
F65C 505C G Dead key
F648 5048 H 5D53 Switch NAME file
F664 5064 Q 5D68 Quit to Basic
F64E 404E R 5800 Restart HOT Z (also RAND USR 22528)
F65A 505A S 65E4 Switch to Single-Stepper
F652 5052 T 5C5F Display top of NAME list
F654 5054 THEN 5BC1 Decimal address to follow
F656 5056 TO 63E7 Switch floating-point display
F64A 504A W 5CEC Switch off floating-point interpreter
F650 5050 Y 63F0 Print screen
F666 5066 F-1 Dead key
F668 506B F-2 “
F66A 506A F-3 5D71 User hookup (Routine addr at 7FA9/FEA0)
F66C 506C F-4 6088 User hookup (Routine addr at 7FA2/FEA2)
Single-Step Command File
File Key Routine Function
(64K) (16K) (Shift)
F6DA 50DA A Dead key
F6CB 50CB AND Display breakpoints
F6DC 50DC D User hookup (Routine addr at 7FAA/FEAA)
F6D4 50D4 E Dead key
EDIT Back up one byte
ENTER Run one step
F6DE 50DE F User hookup (Routine addr at 7FAC/FEAC)
F6D8 50D8 G Go to breakpoint
F6C4 50C4 H Dead key
Q Quit single-step for disassembly
F6CA 50CA R Run CALL or RST
F6D0 50D6 S Set register value
SPACE Skip step
F6CE 50CE T Twin breakpoints
F6D0 50D0 THEN Set breakpoint 2
F6D2 50D2 TO Set breakpoint 1
F6C6 50C6 W Window switch
F6CC 50CC Y Print screen
WRITE Command File
File Key Routine Function
(64K) (16K) (Shift) Addr
F684 5084 A 5F5A Assembly mode
F672 5672 AND 5A61 LOAD from cursor to END
F686 5086 D 5EZ7 Display switch to DATA
F67E 507E E 5F63 Edit mode
F688 5088 D 5C64 FIND string marked by cursor and END
F682 5082 G 5B4B Christen with NAME
F66E 506E H 5F7D Delete instruction at cursor
F6BA 508A Q 5B1E Hex sum and difference of cursor and END
F674 5074 R 5D47 RUN code at cursor (RET to READ)
F680 50B0 S 65E0 Single step instruction at cursor
F67B 5078 T 5847 Transfer
F67A 507B THEN 5DD6 Delete NAME
F67C 507A TO 6076 Set END variable
F670 5079 W 5A62 SAVE from cursor to END
F676 5076 Y 5D04 Print from cursor to END
EDIT Set INSERT cursor ENTER Quit to READ mode
F68C 50BC F-0 5EC4 Clear memory from cursor to END
F68E 50BE F-1 5EB1 Fill memory with specified character
F690 5090 F-2 5CCA Move RAMTOP to cursor, stack just below
F692 5092 F-3 Dead key
F694 5094 F-4 “
F696 5096 F-5 “
F698 5098 F-6 584D Transfer code and NAMEs to DEST
F69A 509A F-7 5937 Readdress a jump table by displacement
F69C 559C F-8 5980 Relocate code from cursor to END
F69E 569E F-9 63AF Initialize window for single-stepper
F6A0 56A0 F-A Dead key
F6A2 56A2 F-B “
F6A4 56A4 F-C “
F6A6 56A6 F-D “
F6A8 56A8 F-E “
F6AC 506B F-F 5C56 Find next occurrence of string
F6AC 50AC F-G Dead key
FCAE 50AE F-H “
F6B0 50B0 F-I “
F6B2 50B2 F-J “
F6B4 50B4 F-K “
F6B6 50B6 F-L “
F6B8 50B8 F-M “
F6BA 50BA F-N “
F6BC 50BC F-O “
F6BE 50BE F-P 61A3 User hookup (Routine addr at 7FA4/FEA4)
F6C0 50C0 F-Q A3F5 ” 7FA6/FEA6)
F6C2 50C2 F-R A66D ” 7FAB/FEAB)
handwritten page, pasted in back of Hot Z-II USER’S NOTES
        Hot Z-II Commands:
        -----------------
Read mode command are listed at the top of the keys in the top of the two layouts below.
Single-step command are listed on the same layout below the corresponding keys.
Write mode commands are listed on the lower layout. Function key commands are not listed.
Refer to separate list for those.
+—————————————————————————————-+
| |
| INSRT SPON DEC FPFLG <- L ^ -> GRAPH Rubout |
| +—+ +—+ +—+ +—+ +—+ +—+ +—+ +—+ +—+ +—+ |
| | 1 | | 2 | | 3 | | 4 | | 5 | 6 | | 7 | | 8 | | 9 | | 0 | |
| +—+ +—+ +—+ +—+ +—+ +—+ +—+ +—+ +—+ +—+ |
| BACK BPTS BPT2 BPT1 | Read
| |
| BASIC FPOFF HEXED RESET NTOP PRSC | and
| +—+ +—+ +—+ +—+ +—+ +—+ +—+ +—+ +—+ +—+ |
| | Q | | W | | E | | R | | T | Y | | U | | I | | O | | P | | single-step mode
| +—+ +—+ +—+ +—+ +—+ +—+ +—+ +—+ +—+ +—+ |
| QUIT WNDOW RUN TWIN PRSC | commands –
| | —————-
| ASEM 1STEP DATA FIXDF ALNAM FUNC |
| +—+ +—+ +—+ +—+ +—+ +—+ +—+ +—+ +—+ +—+ |
| | A | | S | | D | | F | | G | H | | J | | K | | L | ENTER |
| +—+ +—+ +—+ +—+ +—+ +—+ +—+ +—+ +—+ +—+ |
| SET GO |
| | |
| +—+ +—+ +—+ +—+ +—+ +—+ +—+ +—+ +—+ +—+ |
| SHIFT | Z | | X | | C | | V | B | | N | | M | | . | SPACE |
| +—+ +—+ +—+ +—+ +—+ +—+ +—+ +—+ +—+ +—+ |
| Skip |
| |
+—————————————————————————————-+
+—————————————————————————————-+
| |
| INSRT LOAD DENAM END <- L ^ -> GRAPH Rubout |
| +—+ +—+ +—+ +—+ +—+ +—+ +—+ +—+ +—+ +—+ |
| | 1 | | 2 | | 3 | | 4 | | 5 | 6 | | 7 | | 8 | | 9 | | 0 | |
| +—+ +—+ +—+ +—+ +—+ +—+ +—+ +—+ +—+ +—+ |
| |
| |
| NEXT SAVE HEXED RUN TRAN LLIST | Write
| +—+ +—+ +—+ +—+ +—+ +—+ +—+ +—+ +—+ +—+ |
| | Q | | W | | E | | R | | T | Y | | U | | I | | O | | P | | mode
| +—+ +—+ +—+ +—+ +—+ +—+ +—+ +—+ +—+ +—+ |
| | commands –
| | —————-
| ASEM 1STEP DATA FIND NAME ZAPP FUNC |
| +—+ +—+ +—+ +—+ +—+ +—+ +—+ +—+ +—+ +—+ |
| | A | | S | | D | | F | | G | H | | J | | K | | L | ENTER |
| +—+ +—+ +—+ +—+ +—+ +—+ +—+ +—+ +—+ +—+ |
| |
| | |
| +—+ +—+ +—+ +—+ +—+ +—+ +—+ +—+ +—+ +—+ |
| SHIFT | Z | | X | | C | | V | B | | N | | M | | . | SPACE |
| +—+ +—+ +—+ +—+ +—+ +—+ +—+ +—+ +—+ +—+ |
| Skip |
| |
+—————————————————————————————-+
                FUNCTION KEY COMMANDS:
                ---------------------
Read mode – +———————————————————–
———- | ADDITIONAL INFORMATION
F-3 ZX-File interrupt | ———————-
driver routine | Version 2*2I-1
| memory use $4E00-$7FFF (19968-32767)
F-4 ZX=FILE entry | Rand USR 22528 (5200H) restarts HOT Z (also SHIFT+R
| in READ mode)
| Ramtop = 32640 ($7F80)
Write mode – | ZX-FILE dependent version
———– | Set Ramtop to 19968 + load as data
F-0 Clear | HOT Z-II is 12800 bytes long (12-5 to) ($3200)
F-1 Fill |
F-2 Set ramtop | ZX-FILE – free from 13690 – 16383 (35A7H – 3FFFH)
F-6 Transfer with names | = 2694 (0A86H) bytes free
F-7 Re-address | REM – 4082 – 4AA4 (useable)
F-8 Relocate |
F-9 Initialise window | Name file (start)=SHIFT+T(read) END=NEND(lo-hi)+2
F-F Next find | ALNA start(lo-hi)+2 and NEND address, then SHIFT+H(read)
F-P user hookup (7FA4) |
F-Q user hookup (7FA6) | VOL. FOR ZX-FILE = 100% (FULL)
F-R user hookup (7FA8) |
Document