In SWN 2/4 and 2/5, I discussed the construction of an eprom programmer for the 2068 and 1000. Those of you with 2068s should find interest in a way to utilize programs that are burned onto those eproms. The cartridge reader board will give you a way to run “instant software.”
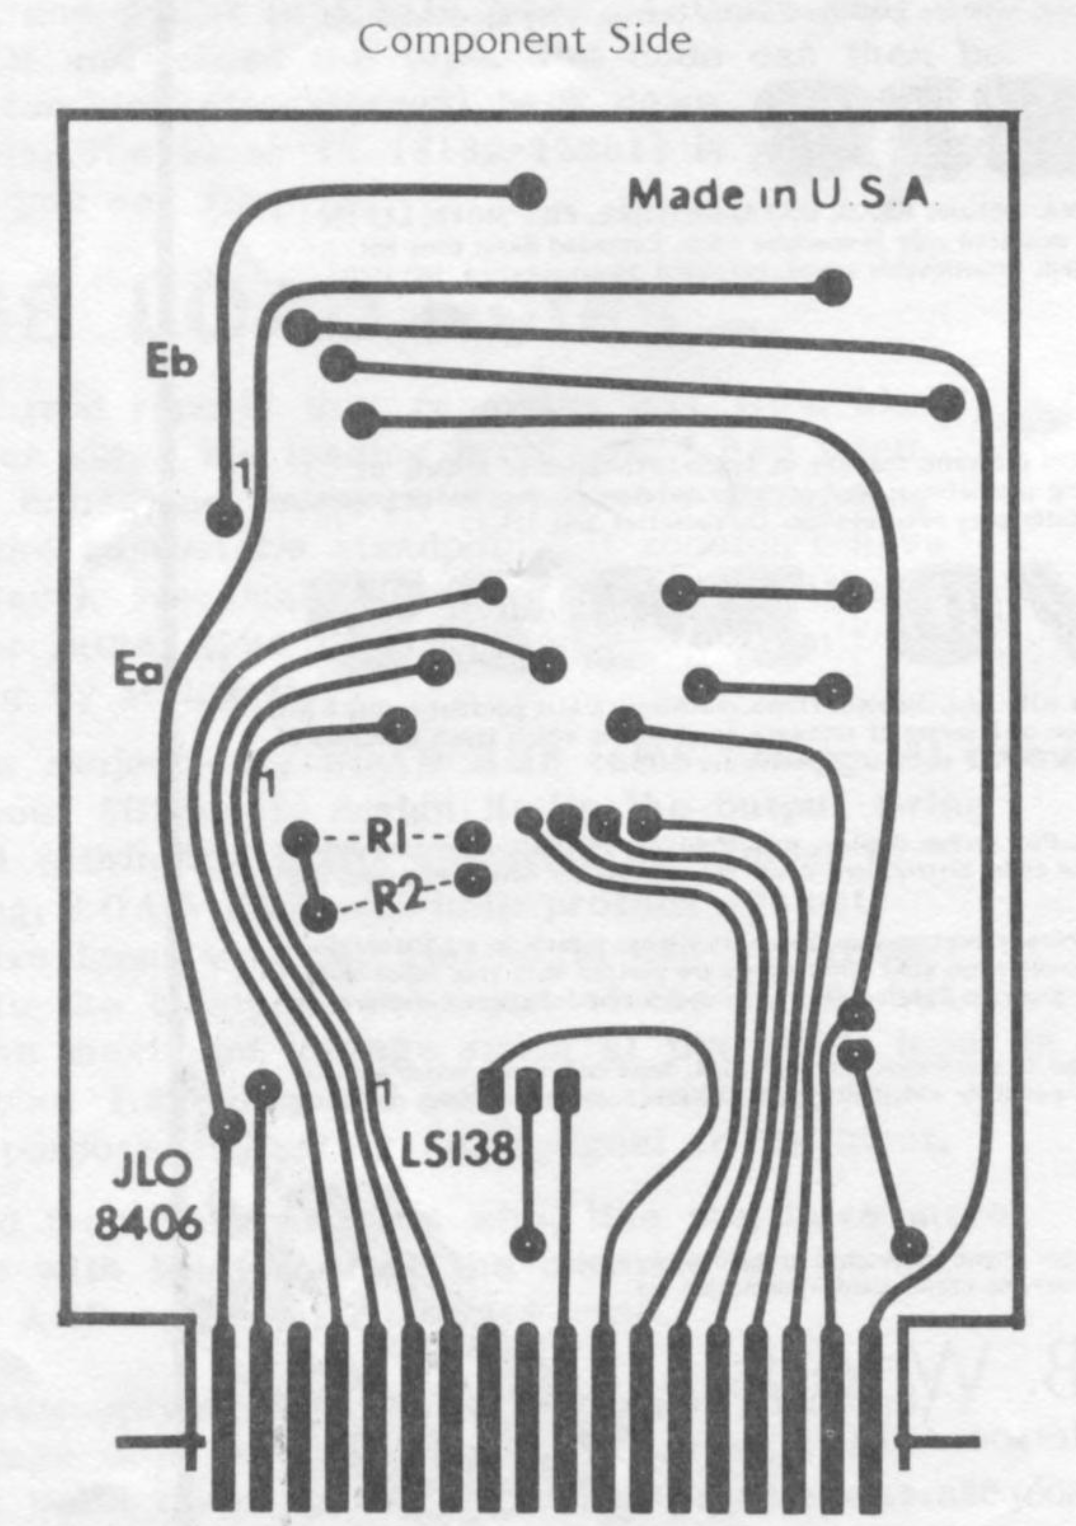
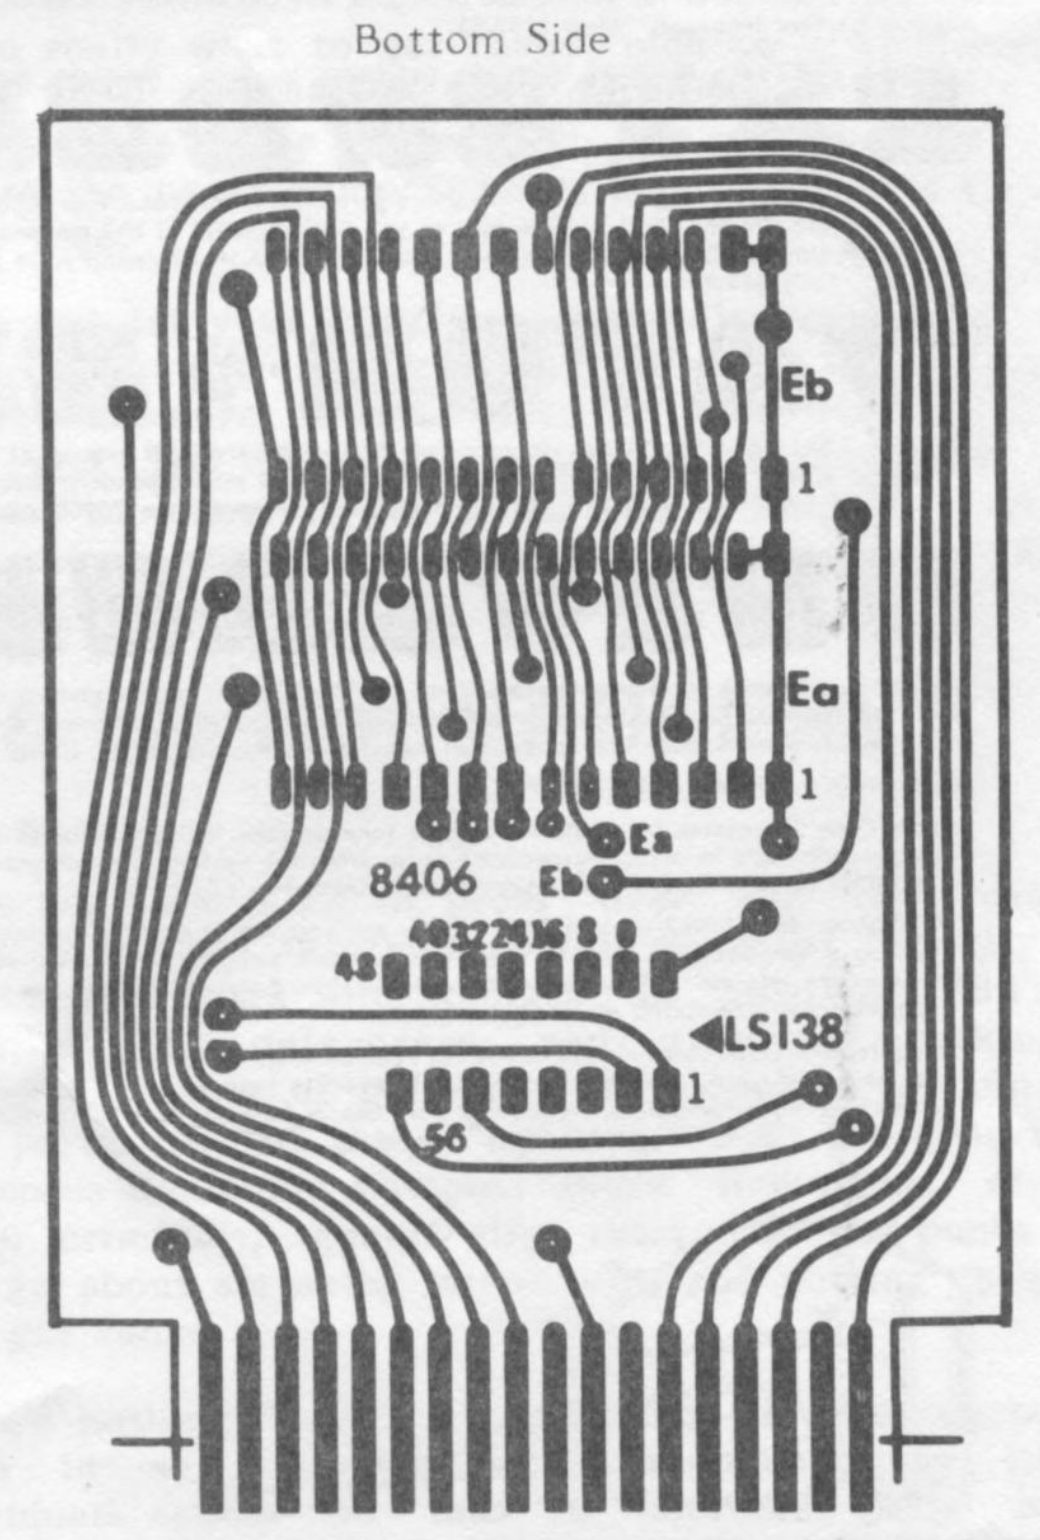
If you are knowledgeable at making printed circuit boards, then you can use the artwork supplied here to make your own boards. You will have to install feedthroughs at each of the donut locations that don’t have a resistor or socket passing through them. Alternately, I now supply a cartridge board with plated through holes for $10.95, or $15.95 with all of the necessary parts and requires no feed throughs to be soldered in.
ASSEMBLY INSTRUCTIONS for EPROMS
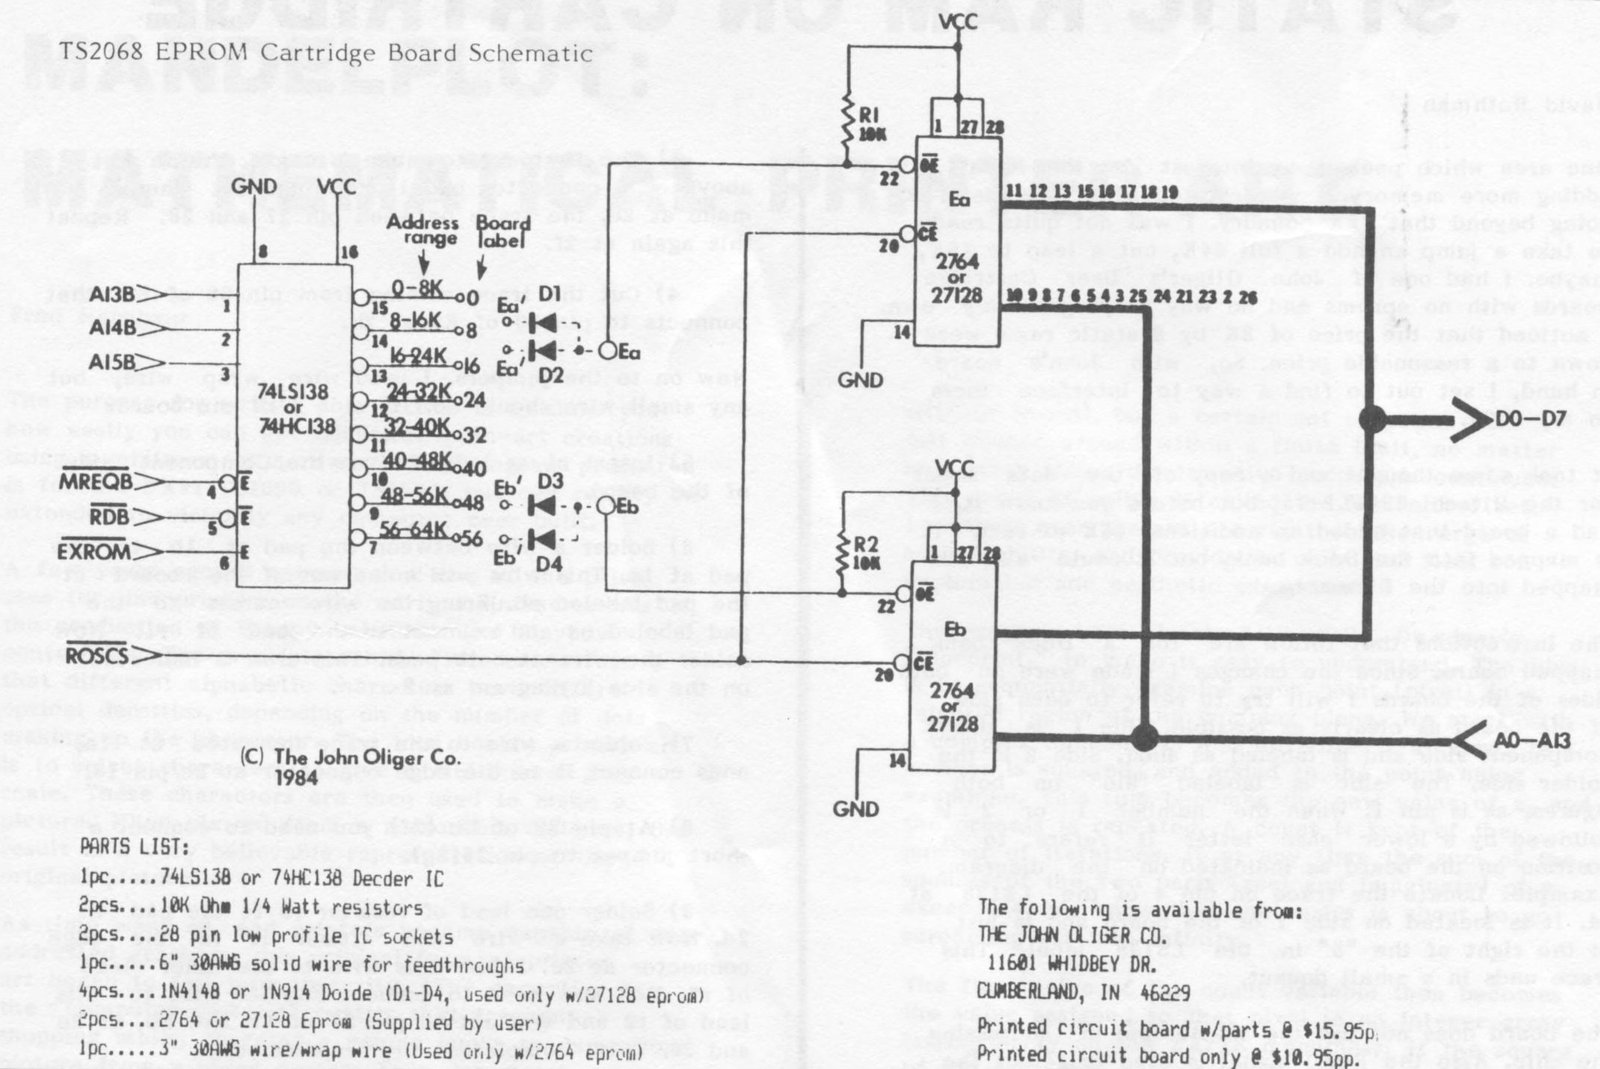
- STEP 1: Solder the two 28-pin IC sockets onto the board, using extra care on the narrow pads surrounded by board traces. Solder resistors R1 and R2 onto the board where indicated, as etched onto the pc’s component side of the board. Note that if you made your own board, you will have to solder these on BOTH sides of the board.
- STEP 2: Carefully solder the LS/HC 138 IC in place on the board. DO NOT use an IC socket for this chip, or the board will not clear the TS2068’s case upon insertion.
- STEP 3: Use acetone and a soft cloth, or (preferably, for safety’s sake) a commercial flux remover to clean all traces of flux from the board. CAREFULLY inspect all of your soldering, hunting for poorly soldered joints or shorts to nearby traces. Touch up anything looking even remotely suspicious.
- STEP 4: For 2764’s, solder & wirewrap jumper from the 138’s pins marked “32” and “40” to the donuts marked “Ea” and “Eb” respectively. For 27128’s, solder diodes D1-D4 in place of the jumpers. Cathodes (banded ends) go to “32,” “40,” “48” and “56.” The anodes of the two on “32” and “40” go to “Ea,” and the anodes connected to “48” and “56” go to the “Eb” donut.
Your Cartridge Board is now complete and ready for EPROMs!
Using Cartridges
On power up, the TS2068 looks at certain locations (hereafter called “AROS overhead bytes”) in the ROS (ROM Oriented Software) bank of its memory space to see if a cartridge is installed in its cartridge port. If it finds the required data, it uses the information to set itself up for that particular cartridge. The data contained here, from 8000h to 8007h for AROS (Application Oriented Software), tells the system the 8K memory “chunks” used by the cart within the ROS (cartridge) bank, the language the software is in (BASIC + MC or MC only), etc.
It should be noted here that the system also checks the bottom of the ROS bank for LROS (Language ROM Oriented Software) firmware (for example, an emulator board). We will be concerned only with AROS in our applications.
Because the AROS overhead bytes occupy 8000-8007h, the first byte available for our programs is 8008h.
To be efficient, we will start ALL of our BASIC programs at 8008h, and I recommend starting a MC- only program here also. In this article, however, I’ll only cover BASIC language programs; The MC-only applications of this board are left to you.
Table 1 shows the AROS overhead bytes’ locations, along with each location’s function in the system and the recommended values for a typical BASIC program. These are the actual values we will be using for our purposes. MOST BASIC programs will run directly out of our cartridge as is, but , a few may require slight modifications for functions not supported by the 2068 cartridge system. The only two functions I’ve found so far that are NOT supported on a cartridge that ARE supported in RAM-based programs are: 1) User defined functions (DF FN & FN), and 2) Non-executing FOR/NEXT loops such as FOR N=2 TO 0, which return with report “I” from AROS.
Table 1: AROS Overhead Bytes
| Address/Function | Meaning | Our Value |
|---|---|---|
| 8000=Language type | 1=BASIC, 2=MC Only | 01h BASIC |
| 8001=Cartridge type | 1=LROS, 2=AROS | 02h AROS |
| 8002/8003=Prog. start address | LSB/MSB of start address | 0880h Program begins at 8008h |
| 8004=8K chunk spec | Bit 0-7=8K blks; 0-7 used if 0 | 0Fh 8000-FFFFh in use |
| 8005=Auto-start spec | 1=autostart, 0=not auto | 01h Autostart |
| 8006-8007=RAM? | Bytes in RAM reserved | 0000h All of RAM available |
Image Gallery