
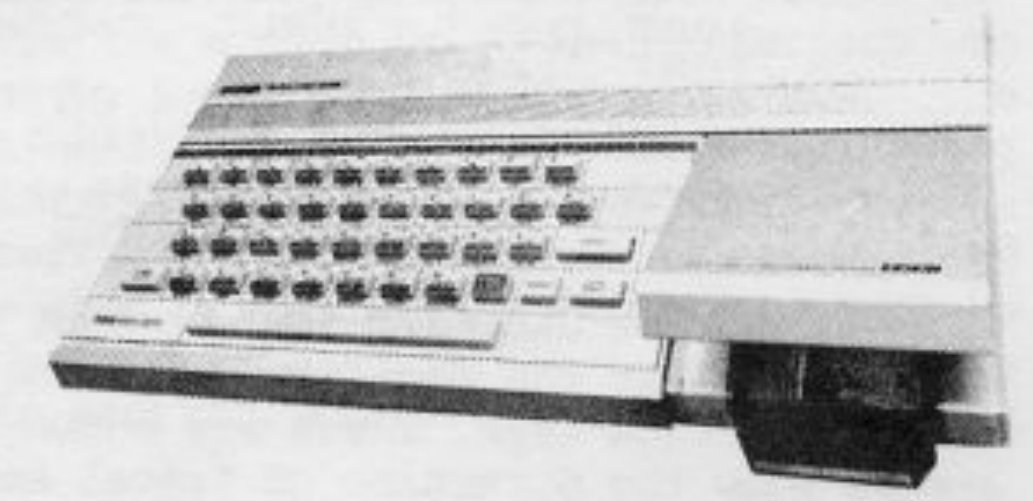
SKETCHIT-G is an artist type of program that exploits the many capabilities of the TS2068 computer to produce graphics of all sorts on the visual screen. These displays can be copied by the TS2040 printer and/or saved on tape for future recall and merging. The Timex computer has several resident functions that can be utilized for this purpose and SKETCHIT-G is designed to coordinate all of these capabilities into a single, unified program.
The principal routine of the program is one of drawing straight lines by plotting pixels in any of the EIGHT cardinal directions, simply by touching one of a selected cluster of eight letter keys. Most artist type of programs only go this far. Although useful in an over-all drawing program, this feature is limited in what it can do. We need more.
Straight lines in directions other than the cardinal ones can be produced by using mathematical considerations, and SKETCHIT-G does this to produce lines in two other ways: a) by using the pixel coordinates of the line terminals or, b) by using the coordinates of one terminal and its angular direction and pixel length. All three of these methods may be necessary in unhampered, graphical construction.
The TS2068 has a built-in facility for drawing circles and arcs of circles, but except for full and half-circles, the facility is impractical and difficult to control. SKETCHIT-G uses only that part which it does well, and relies upon mathematical concepts to draw arcs. But don’t be scared off. The mathematics will be done by the computer. And, it has INPUT prompts that clearly tell you what data it needs from you and in what order.
SKETCHIT-G is a user-friendly program. It includes an error trapping device that conveniently refuses to allow the program to get hung up if you should make, or try an “illegal” entry. But this can back-fire if you want to get back to the listing as BREAK does not work in the ON ERR mode. BREAK is treated like another error, and the program continues. Hence, the zero key has been set aside for an escape device. Remember this!
How to use SKETCHIT-G might best be explained by describing what the dedicated keys do. First, there are EIGHT direction keys. These are shown in Figure 1. The arrows show the direction of travel each particular key controls. The middle, or “S” key, has been selected to turn off pixel “flashing”. Flashing has a long ON cycle when in the draw mode and a long OFF cycle when in the erase mode. Pixels are small. One must look close to discern this difference. Also, erase, the pixel must retrace exactly the path that it took to draw. And especially in the case with curved lines. This means that it must traverse the line in the same direction. This is because the finite size of the pixel allows only an approximation of the true line, and the same line might be drawn with other pixels in reverse.
The area set aside on the screen for these graphics is all of that covered by screen lines number 1 to 20 inclusive. Line 0 and Line 21 have been set aside for titles, remarks, etc. You may draw in these lines, but avoid doing so. It is suggested that a screen grid showing pixel coordinates plus line and column numbers be used and that the desired design be initially sketched out in pencil with terminals and angles of lines be identified by coordinates and/or degrees. This information can then be transferred to the computer line by line in almost any order. Of course one is helped a bit by having some drafting skill to do graphics, but all skill in this application is a low level requirement.
The following is a tabulation of what action each of the number keys produces:
1 - Relocates the pixel PLOT
    coordinates.

2 - Full circles by the CIRCLE
    command.

3 - Lines and half-circles by
    the DRAW command.

4 - STRING$.  Can accept any
    character or group of char
    acters, spaces, keyboard
    symbols, pre-fabricated
    UDG's, etc.

5 - Lines where start, length,
    and direction are known.
    These are called vectors.

6 - Arcs of circles.

7 - TITLES & COPY the display.
    Have a printer ready.

8 - SAVE the display on tape,
    for future work.  Have re-
    corder ready and running.

9 - Exchange DRAW and ERASE
    modes.

0 - EXIT the ON ERR mode.
    Gives a choice to continue
    or CLS and start over.
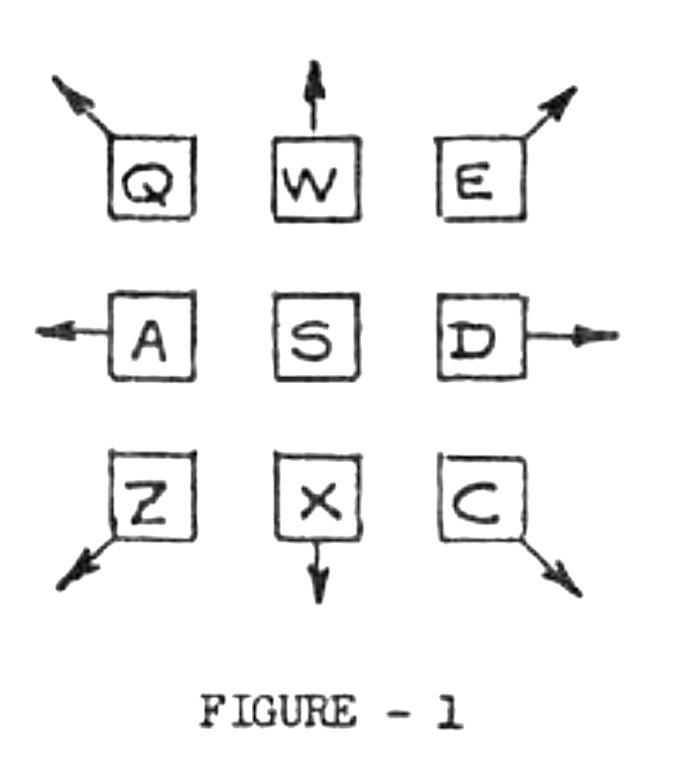
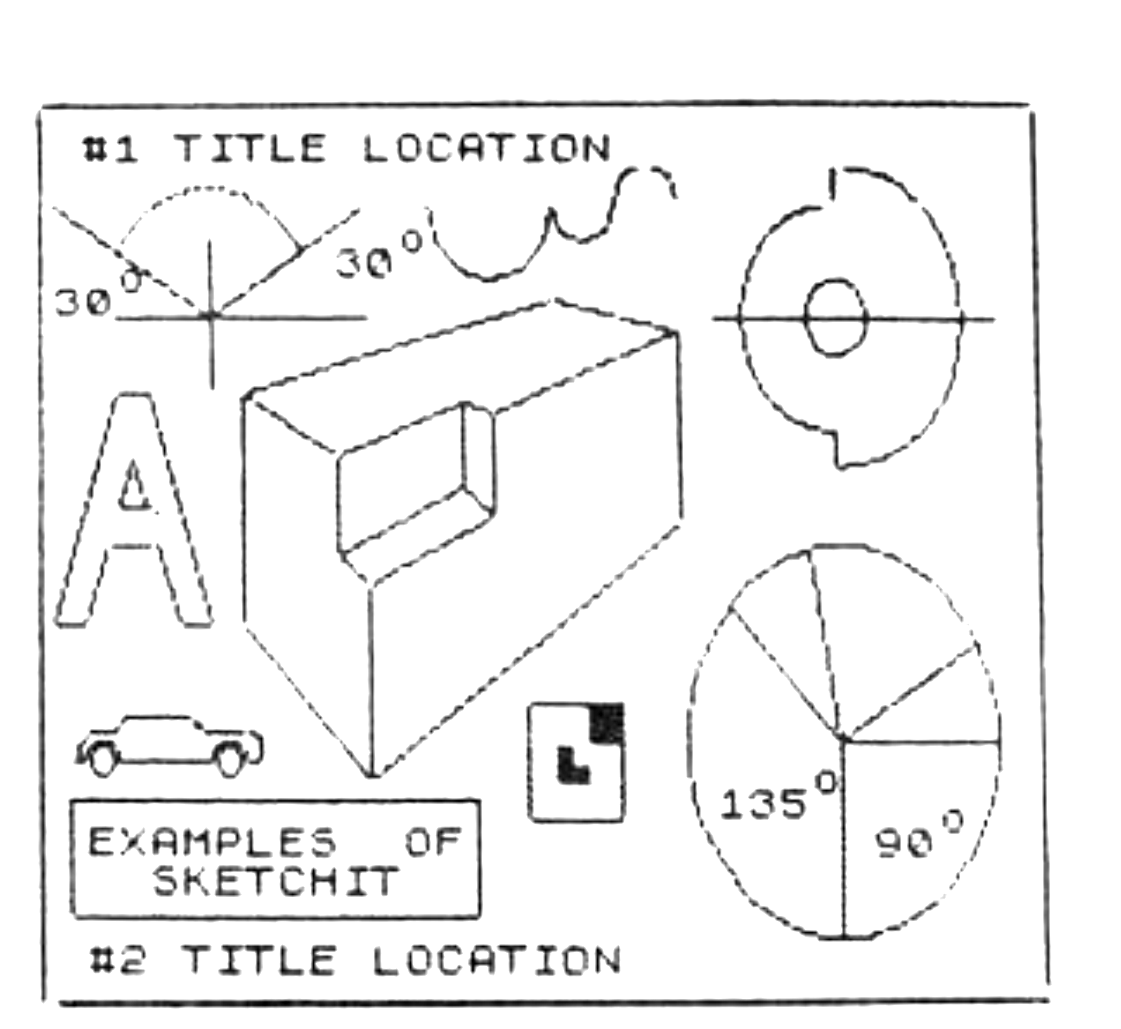
Figure 2 shows a variety of shapes and designs produced by the action of SKETCHIT-G. Let us run thru one of the preceding actions…say the arc drawing feature initiated by the “6” key. In particular, refer to the arc shown in the upper left corner. To draw an arc, we must know its radius and the center point of that radius. We must also know what sector it covers and in this program the sector is defined by the starting radius and the ending radius. In turn, these are measured counter-clockwise in degrees from an arbitrary horizontal line, the initial line. In this example, the starting radius is 30 degrees from the intitial line and the terminal radius is 150 degrees from the initial line. Of course none of the straight lines that are in this arc sample are needed to draw the arc. They are included here merely to help visualize the arc drawing parameters, and how the arc relates to them. Notice too, that the arc draws itself in a counter-clockwise direction. All of the curves in this program, circle and half-circle included, develop in this same way. All angles are measured form the same horizontal, initial line, counter-clockwise from 0 to 360 degrees. This concept is more or less customary in mathematics and related subjects.
You will note that the “3” key is for both straight lines and half-circles. The straight line is defined by its starting coordinates and “pitch”. Pitch here means how far up or down and how far left or right the second terminal is from the first, measured in pixels. If you are using the “3” key for drawing half-circles, then the line is not drawn. Instead a half-circle is drawn for which the line would be its diameter. And the half-circle plots from the initial coordinates, counter-clockwise to the second terminal of such imaginary lines.
One other thing. Since the program is in BASIC and a lot of calculation is performed, you may notice that key response and INPUT prompting is slow at times. A good rule to follow: look at your INPUT data on the bottom line of the screen before pressing ENTER.
The various sub-routines in the program listing are identified by REM lines to help you to analyze it and to see what makes it work. Have fun.
Sketchit – G
   1 REM **   "A-44a", 6-8-86
   2 REM ** SKETCHIT-G by Warren Fricke
   5 BORDER 4: PAPER 6: CLS
   6 LET x=125: LET y=90: LET k=0: DIM q$(32)
  10 DIM w$(32): DIM t$(32)
  20 INPUT "Hit ENTER to continue ";z$
  22 ON ERR GO TO 85
  25 LET aa=PEEK 23556
  30 IF aa=48 THEN ON ERR RESET : GO TO 1000
  35 IF aa=57 THEN LET k=NOT k
  40 IF aa=83 THEN GO TO 10
  45 LET x=x+((aa=69 OR aa=67 OR aa=68) AND x<255)-((aa=81 OR aa=65 OR aa=90) AND x>0)
  50 LET y=y+((aa=81 OR aa=87 OR aa=69) AND y<167)-((aa=90 OR aa=88 OR aa=67) AND y>8)
  55 PRINT AT 0,6;"X = ";PEEK 23677;"    ","Y = ";PEEK 23678;"  "
  60 IF k=1 THEN GO TO 80
  65 PLOT INVERSE 1;x,y: PAUSE 3: PLOT x,y
  70 IF aa>48 AND aa<57 THEN GO TO 100*(aa-47)
  75 PAUSE 10: GO TO 25
  80 PLOT x,y: PAUSE 3: PLOT INVERSE 1;x,y: PAUSE 12: GO TO 25
  85 ON ERR RESET : BEEP 1,-25
  90 PRINT #1; FLASH 1;" ILLEGAL MOVE "
 100 PAUSE 180: GO TO 20
 200 REM ** NEW PLOT COORDINATES
 210 INPUT "NEW X-Value, 0 to 255 = ";x
 215 IF x<0 OR x>255 THEN GO TO 210
 220 INPUT "NEW Y-Value, 8 to 167 = ";y
 225 IF y<8 OR y>167 THEN GO TO 220
 230 GO TO 25
 300 REM ** FULL CIRCLES
 305 PRINT AT 0,0;q$
 310 INPUT "X Center point = ";x1
 320 INPUT "Y Center point = ";y1
 330 INPUT "Radius = ";r
 340 INPUT "0 to DRAW; 1 to ERASE = ";b
 350 CIRCLE INVERSE b;x1,y1,r
 360 GO TO 25
 400 REM ** LINES & SEMI-CIRCLES
 405 PRINT AT 0,0;q$
 410 INPUT "Starting X-coordinate = ";x1
 420 INPUT "Starting Y-coordinate = ";y1
 430 PLOT INVERSE 1;x1,y1
 440 INPUT "X Coordinate difference = ";x2
 450 INPUT "Y Coordinate difference = ";y2
 460 INPUT "0 for a line; 1 for a"," half-circle = ";t
 470 INPUT "0 to DRAW; 1 to ERASE = ";b
 480 DRAW INVERSE b;x2,y2,t*PI
 490 GO TO 25
 500 REM ** STRING$ INPUT
 510 INPUT "ROW number = ";r
 515 IF r<1 OR r>20 THEN GO TO 510
 520 INPUT "COLUMN number = ";c
 530 INPUT "STRING$ = ";m$
 540 PRINT AT r,c;m$
 550 GO TO 25
 600 REM ** VECTOR INPUT
 605 PRINT AT 0,0;q$
 610 INPUT "Origin: X-coordinate = ";x1
 620 INPUT "Origin: Y-coordinate = ";y1
 630 INPUT "Vector length = ";L
 640 INPUT "Angle: 0 to 360 deg. = ";A
 650 INPUT "0 to DRAW; 1 to ERASE = ";b
 660 FOR r=0 TO L
 670 PLOT INVERSE b;x1+r*COS (A*PI/180),y1+r*SIN (A*PI/180)
 680 NEXT r: GO TO 25
 700 REM ** ARCS of CIRCLES
 705 PRINT AT 0,0;q$
 710 INPUT "X Center point = ";x1
 720 INPUT "Y Center point = ";y1
 730 INPUT "Radius = ";r
 740 INPUT "Initial angle (deg) = ";a1
 750 INPUT "Terminal angle (deg) = ";a2
 760 INPUT "0 to DRAW; 1 to ERASE = ";b
 770 FOR A=a1*PI/180 TO a2*PI/180 STEP 1.5/r
 780 PLOT INVERSE b;x1+r*COS A,y1+r*SIN A
 790 NEXT A: GO TO 25
 800 REM ** TITLES-COPY DISPLAY
 810 ON ERR RESET
 813 PRINT AT 0,5; FLASH 1;" ENTER A TITLE HERE "
 816 INPUT "#1 TITLE. 32 Characters, max.";t$
 820 PRINT AT 0,0;t$
 830 INPUT "#2 TITLE. 32 characters, max.";w$
 840 PRINT AT 21,0;w$
 850 INPUT "Get PRINTER ready & hit ENTER";z$: COPY
 870 INPUT "INP. Y for 2nd COPY; else N ";z$
 880 IF z$="y" THEN COPY
 885 PRINT AT 0,0;q$: PRINT AT 21,0;q$
 890 GO TO 22
 900 REM ** SAVE DISPLAY
 910 ON ERR RESET
 920 INPUT "Get RECORDER ready; hit ENTER";z$
 930 SAVE "SKETCHIT"SCREEN$
 940 GO TO 22
1000 REM ** EXIT ON ERR MODE and / or START OVER
1005 INPUT "INPUT: C=CONT. N=RESTART ";z$
1010 IF z$="c" THEN GO TO 22
1020 IF z$="n" THEN CLS : RUN
1030 IF z$<>"c" OR z$<> "n" THEN GO TO 1005
Note: Type-in program listings on this website use ZMAKEBAS notation for graphics characters.