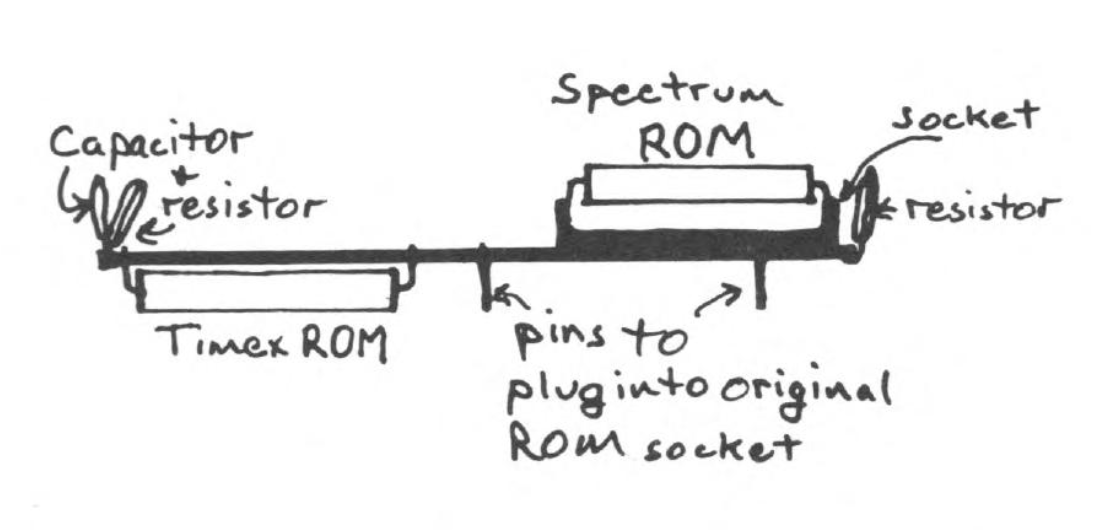
In last month’s article, we inadvertently left out the printed circuit board layout, so here it is this month with our apologies. Also I have drawn a side view showing how the chips sit on the board.
When installing the chips, always use great care in positioning the chips in the sockets. Generally, the width between the two rows of pins are wider than the socket spacing. To narrow the spacing, hold the chip with both hands, fingers holding top and bottom and press one of the rows of pins on their side onto a hard surface with the pins still in the protective foam. Carefully bend in both sides slightly until the chip is easier to fit into the socket. The outward bend of the pins help “force” a good connection to the socket, so don’t over do it.
The foam is there to protect the chip from static discharges. Keep the chip in the foam as long as possible. Remember, the drier your climate, the more chance you have of static damage. Don’t forget to protect the chips you take out such as the 2068 ROM. Your best bet is to stick it in the other side of the foam your new ROM is in. Also remember that in any work you do with any of your computers, you are working with static sensitive components; so be careful.
More software that we now know to work on the 2068 with the Spectrum ROM enabled include:
- Tutankhamun
- Teradacktil
- Penetrator
- Advanced Graphics
- Chopper Rescue
- Voice Chess
- ETX
- Code Name Mat
- Groucho
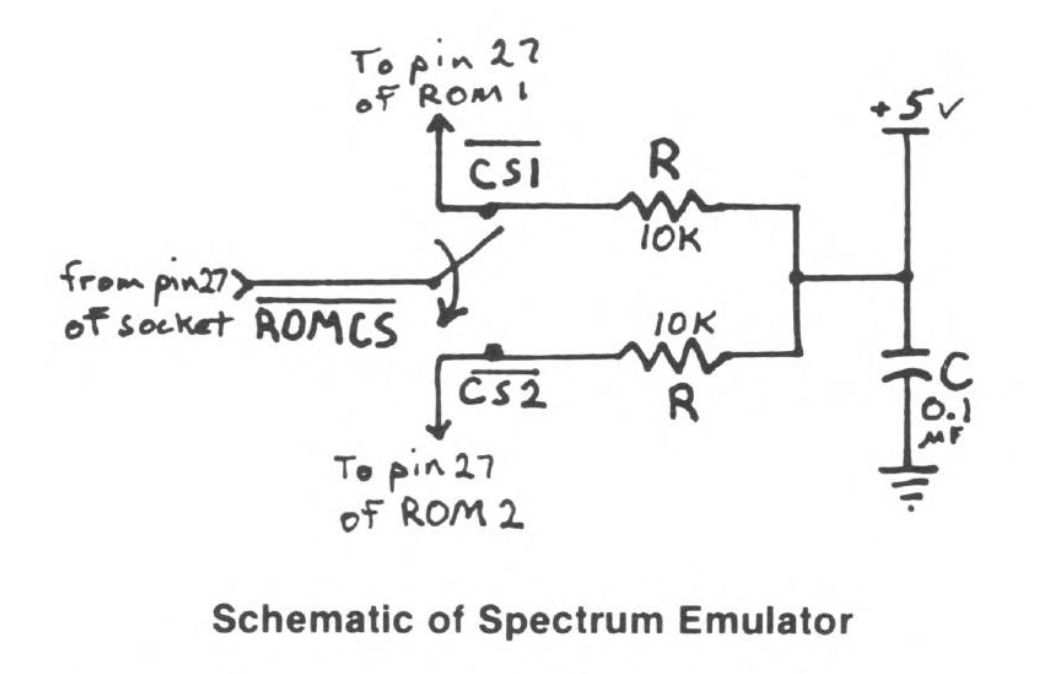
Sometimes the Spectrum ROM has a hard time initializing. You can tell from the start if it will or won’t. If the screen BORDER initializes white then no problem should occur. If the BORDER initializes black, go ahead and turn off the computer and try again. For me, it has trouble initializing about 20% of the time.
Products
Media
Image Gallery