Authors
Publication
Pub Details
Date
Pages
The Question
Disk drive or no disk drive? That is the question. Or, rather, it was the question, I looked long and hard at all the options and decided to stay with my Sinclair and to add the Aerco floppy disk interface and disk drive to my miniature computer. Many of you out there in Sinclairland are wrestling with the same questions. Let me tell you about my choice and about the happy results.
About a year ago when I put together my $99 handful of hardware the little mite worked. Though I did not know the difference between LIST and LET, I laboriously worked on the miracle membrane. By summer my knowledge had increased and I decided to double my investment by adding a box of Byte-Back parts which gave me a neat 64K memory. By fall I had acquired useful software: a data base (The Fast One) and a word processor (Z-Text /L-Text) from England. I had begun to use this little wonder in a small (church) office.
My part-time secretary politely balked at the toy keyboard when I showed her how to use it. The result was that the original investment increased again when I bought a $25 surplus keyboard, a few diodes, wire, and connectors to attach it to the computer. At least it worked, and it worked well.
Horizons continued to lift. Uses for the expanded Sinclair loomed into view beyond all dreams. By winter I needed a good quality printer to create labels for my mailing list of 250 names and to do lots of other printing. At this point I made an important decision. I would buy the printer as long as I could use it later on with a “good” computer as well as use it now on my “Rube Goldberg,” I was into this whole project to the tune of about $250 for hardware. I added double that investment by getting a Memotech parallel interface and a Prowriter printer. Even though I had now spent $750 for hardware, I knew that my $400 printer could be used later with a “real” computer. From now on I thought I should keep my eyes for the Sinclairland exit door.
New problem: My data base had grown to the point that to load a program took nearly 20 minutes; using the word processor meant a 10 minute wait. Not that one cannot wait and do other things during long LOAD and SAVE times, but what about a disk drive?
The Disk Answer
This decision required a lot more thought and comparison than my printer decision. I could buy a “suitcase” computer and have a neat, integrated unit with lots of super software. I looked, read, talked around, and came to these conelusions: 1) I do not have $1800 for a suitcase computer; 2) My Sinclair does what I need a computer to do; 3) If I buy the right disk drive, I can use it later on a “real” computer.
So I sank another $450 into that $99 Sinclair (which today can be bought for $39, and you get it assembled for the price, too!) on the Aerco floppy disk drive system.
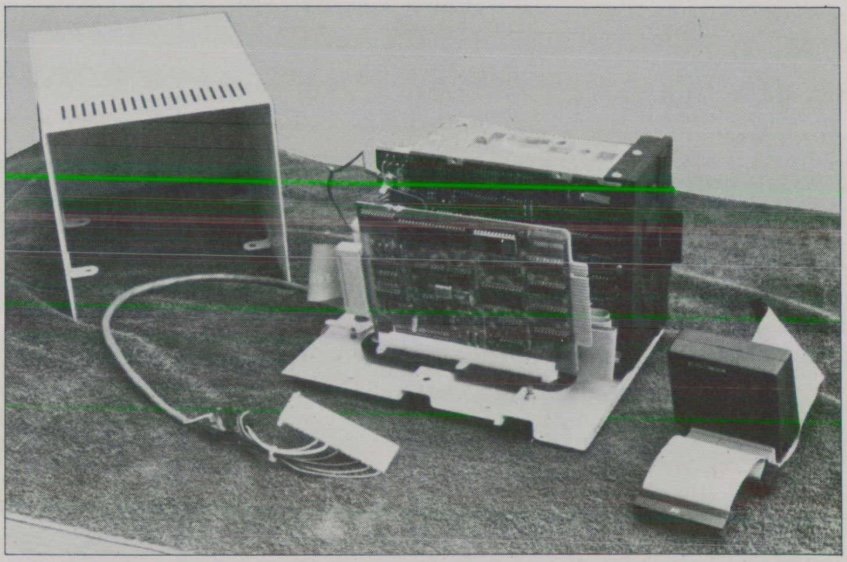
The Aerco Disk Drive
The disk drives sold by Aerco are Pertec FD 250 units. Any Shugart type drive could be used, but at $189 each from Aerco I felt this was the best price around.
The Aerco disk drive unit transfers data at a rate of 250,000 bits per second. Disks (soft sectored, double density, double sided) accommodate 320K. This is considerably faster and a much larger volume of data than is reported for the F12Floppy and the cost is comparable.
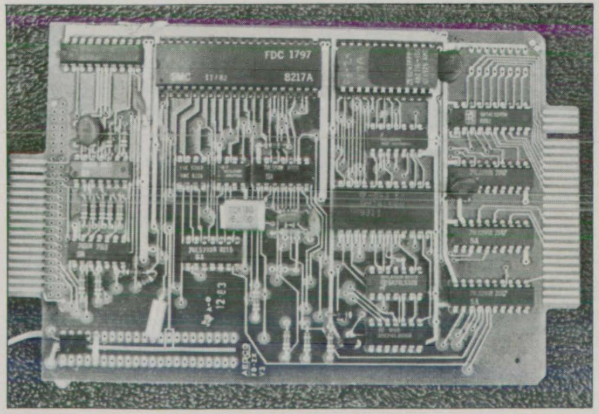
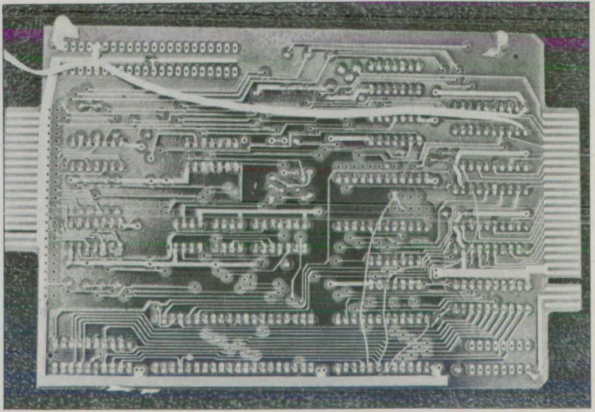
The Interface
The disk interface is a 4 1/2″ x 6″ uncased printed circuit board. A 12″ ribbon cable attaches between the back of my 64K memory pack and one end of the interface which has a mating edge connector. For someone with the Sinclair memory pack which does not have a rear edge connector access, the 12″ ribbon cable has a female connector midway down its length that accepts the memory pack. You then plug the computer end of the 12″ cable directly into the back of the Sinclair,
A second ribbon cable (3 1 length) plugs into an edge connector on the opposite end of the interface. This cable has two female connectors at the far end. These connectors are about 4″ apart. You plug either one of these connectors into your disk drive. The extra plug is for a second drive. Actually, you can connect up to four disk drives to this interface. All you need do is to add two more connectors onto the 3′ cable.
The Aerco interface is equipped with 17 integrated circuit chips, one of which is an EPROM that is used in disk formatting. Also provided is one 5 1/4″ disk containing the systems monitor.
The Power Supply
Power supply required for the interface and drive is +5 volts and +12 volts. Aerco sells a power supply for $60, but I decided to save a little at this point. I bought a 3 amp regulated, filtered surplus 5V/12V/24V unit mail order from John Meshna & Co. in Boston for $20. (This is the same place I had earlier bought my keyboard). For $7.50 I bought a power supply cable from Aerco with a plug that fit the disk drive. There is an extra plug on this cable to power a second disk drive should one ever be added. Also I dropped the 12V to 9V so that I could use this new power supply to power the computer.
The Finishing Touch
To finish off the unit, 1 bought a disk drive cabinet for $35 from Aerco. It accomodates two drives, mounted vertically. Since I only have one drive, I plan to install the interface card in the vacant side of the cabinet.
Using the System
When I first hooked up the system, I had trouble getting it to operate. I got a “DISC ERROR” report on the monitor each time 1 tried to load the system. So I picked up the phone and put in a call to Aerco and got Jerry who walked me through a diagnosis process. I reported each thing that happened, and he was able to diagnose the problem right then and give me the fix over the phone. What happened was that a mechanical link between one of the drive motors and the arm which moves the recording heads across the face of the disk had become disconnected during shipment. All I needed to do was to rotate the motor by hand for one turn. This re-connected it. (Later on when I read the disk drive manual that came with it, naturally I found out that this was covered in the manual!)
It was really great to see this thing come to life and to be ushered into the world of a “real” computer, Sinclair and all. After the system was booted and the disk formatted, I was now ready to take programs that previously had been stored on tape and put them onto the disk.
It works this way. First, load a program into the Sinclair. Then, get into command mode and initialize the disk drive by typing RAND USR 12865, and ENTER. This process brings the disk drive to life and on-line. Next, with a formatted disk in the drive, type RAND USR 12721 and ENTER. The disk drive whirrs a few seconds, and stops. You have just written the contents of Sinclair memory onto page 1 of your disk.
Now for the acid test: press the re-set button (which hangs from a wire on your disk drive interface). When the cursor appears, type RAND USR 13303 and ENTER. Up pops a menu on the video screen with six choices. Type L for List Directory. Up pops a Directory with 16 choices (16 pages). Type 1 for page 1. Up pops your program. I like it.
But one problem: I had no difficulty loading my programs onto disk except the one program that took 20 minutes to load by cassette tape. This disk drive would not work with the very program for which I had bought it! Idea: call Aerco and talk to Jerry. No, first, try to figure out why it will not work. Ah, yes, each side is divided by the formatting process into 8 pages. 160 divided by 8 means that each page can only acccommodate 20K. And my master data base contains nearly 40K! No wonder it would not load. Now call Jerry at Aerco!
Jerry said he would write a routine to accommodate my 40K program. 1 sent him an extra $10 for the service. A week later he called me back to let me know a new EPROM was on the way and that all I had to do was to switch the EPROM on the interface card. I could now format pages in two ways: disks with 16 pages at 20K each or disks with 6 pages at 53K each. Problem solved!
Conclusion
Complaints? Only the common one that all of us novices have: more documentation, please (but Jerry knows the need for this). Pete, my 15 year old son, and I (mostly Pete) were able to figure out how to do things, even if the documentation did not tell us. Otherwise, a phone call was all that was needed, and Jerry will talk to you.
I have found my dealings with Aerco to be a delight. Jerry has now become a friend. Sometimes shipments may be slow, (I did have to wait for some deliveries), but, when I decided to order the disk drive from him, he shipped it the same day 1 called. I had not called him till 4 p.m.! I cannot say enough good about the way I have been treated at Aerco. Besides, their product is good, and well supported by them.
I like my Aerco-Sinclair, (or is it Sinclair-Aerco?). I like the rapid LOADs and SAVEs. I like having the contents of 16 cassette tapes now on one disk. I like the fool-proof transfer of data, I have not experienced one failure in data transfer.
So if you have long programs, do not fear staying in Sinclairland. At a total hardware cost of $1300 I have a 64K disk system with 9×9 dot matrix printer, with a used video monitor that meets my needs. If I ever opt for out, I take my monitor, printer, and disk drive with me and that is $900 of the $1300. Not a bad deal!