
We continue discussion of Bill Jones’ suite of Word Processors for the TS-2068. So, get out your disk, Daisy.B6, Disk No.1.
Upon AUTOSTART, copyrighted banner comes up with a little tune and a request, that you “Press A Key…”.
For the second prompt, we press 2, since we normally wish to use our Brother M-1109, a dot matrix printer. Press 3, in case you have not yet matched the program to your printer via a customized routine “stymn.B6” and menu “ps.C1”. Press 1 will allow you to follow along, using the TS-2040 as a printer for your word processing.
The third prompt requests, that you describe your printer interface. We select 1 for our AERCO Centronics Printer Interface. Select 2 for Tasman CPI or 3 for A&J. Right now, we need software-generated line feeds. So, we answer Y to this fourth question.
Right Margin Justify is about the best thing to appear in home computing software, that we have ever seen. So, Y is the answer to the prompt #5. As you see, we like to indent the first line of our paragraphs by five spaces. So, we answer the last question in the affirmative.
This brings on the Function Menu. Notice Turbo = 1. We have just LOADED that incarnation of Daisy, which handles Input/Edit. The Main Menu for this facility is the Quickie Menu. So, we press 1, press 1 again (for Daisy dB Manager,) and get it straight-away.
In the Input/Edit mode, the principal application routines are “inpt.B6”, “edt.B6”, and “cat.C1” . Other application routines are Deleted and these last three are Merged in, whenever Turbo is changed to 1 or to 3, or whenever Input-Edit is selected at the Function Menu (as option #1.) Or, of course, they can already be on board, as in this case of the AUTOSTART selection on the Daisy disk. And, by the way, the Quickie Menu is the “Daisy dB Manager.”
Should we “Press Select” item “1. Typing,” we are presented a blank screen with a brief display on line 22 of “Arrows = EditCap+SymShf = Menu”. This is Bill’s on-line indication of a way back out of the typing screen and in to the Quickie Menu, similar to the “Function Keys” of Mscript. In the Input/Edit mode of Daisy, we have two phases, the Input phase and the Edit phase.
With the departure of the display on line 22, we enter the input phase, which accepts keyboard input at typewriter speed (at least 30 wpm) and builds a “typing buffer”, called u$. Any cursor movement with the arrows enters the edit phase. In order to re-enter the input phase, simply hit the Enter key. Now, hit “Cap+SymShf”, in order to get the Q menu back onto the screen.
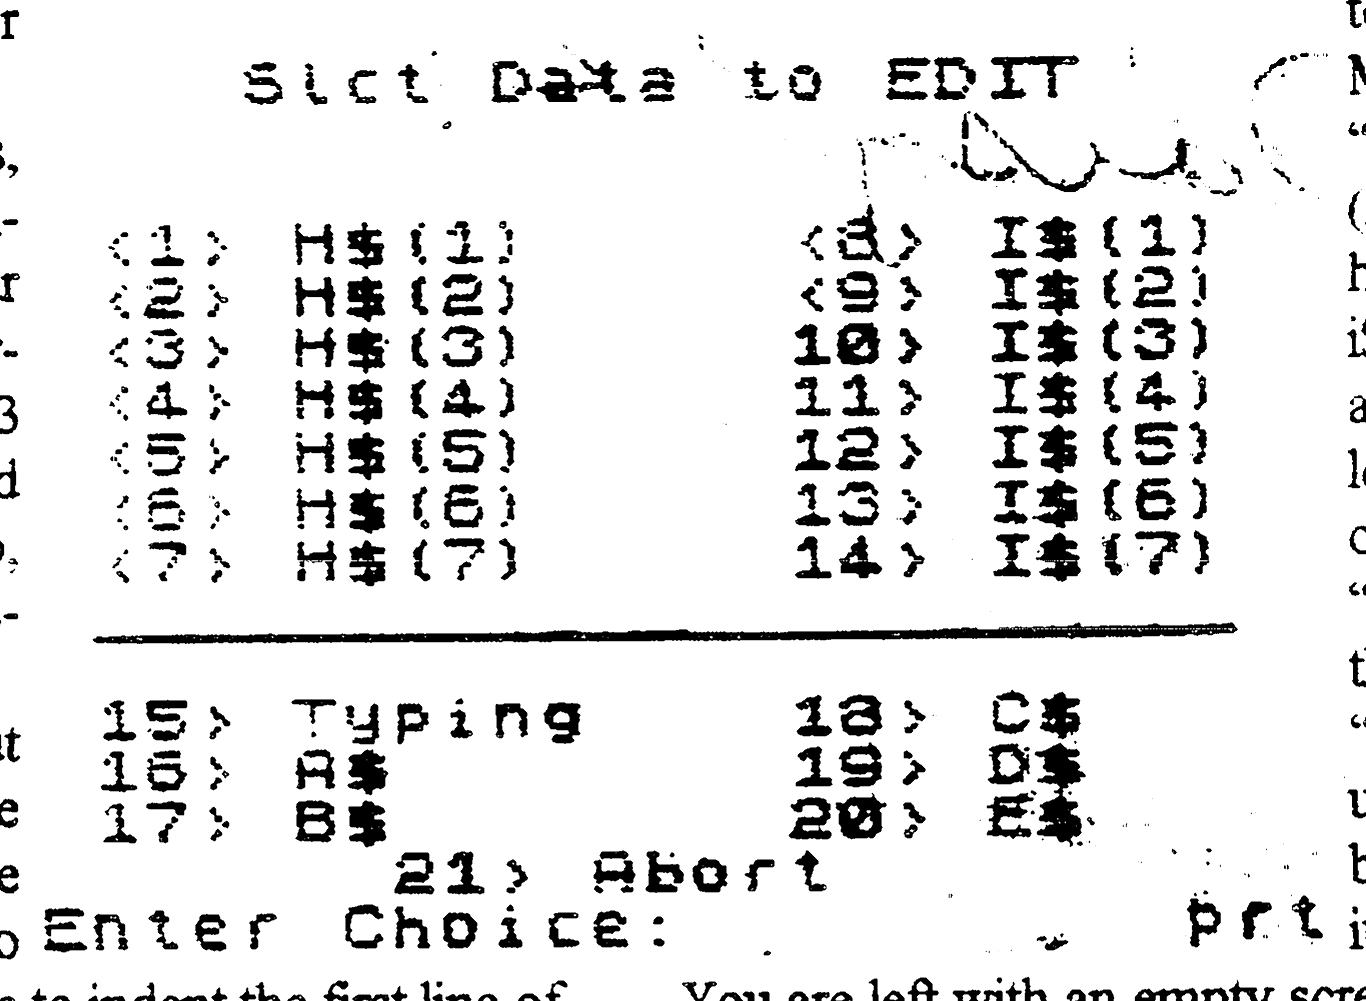
Should we “Press Select” item “2. Re-ed”, we are presented with a menu of 21 choices. Choice #21, Abort, gets the Quickie Menu back with no potential damage done. The other 20 choices place any of 20 data strings on screen for editing in edit mode. Whenever in the edit mode, a press of the pound key “#” introduces us to Block Delete and Block Insert. Enter resumes a slower input mode. # implements a block insert (at the underline symbol) of L$, another string, or just arbitrary typing, upon hitting the Enter key. As before, “Cap+SymShf” allows us to escape to the Quickie Menu.
“3. Store” allows us to store (in RAM) each of h$(1), h$(2), … , h$(7) and i$(1), i$(2), … , i$(7), in that order, after we enter a paragraph length, one for the h’s, another one for the i’s.
“4. Help” takes us back to the Function Menu.
“5. Delete Buffer” allows the user to reinitialize the typing buffer (u$), without storing it into one of the h’s or i’s. You are left with an empty screen in input mode, as in selection #1.
“6. View/Edit Array Cells” permits the user to view and edit any of the h’s or i’s. Very handy!!!! But, the edit mode, here, requires patience and is nevertheless very handy.
“7. Word Replace, Global” searches each of the h’s, i’s, and selected other strings for a desired word, and replaces it with an even more desirable word.
“8.” allows typed input to the L$ string, the same one that can be entered at selection #2, above at “Block Insert”.
“9.” cycles the input cursor between “L” and “C” .
“:” reinitializes all the h’s, all the i’s, all the h’s and i’s, or none at all. Any reset is to a single blank character.
“; ” allows us to create colorful screen strings, such as menus or opening broadsides, fascinating.
” < ” permits us to LOAD (from disk) character arrays into the h’s, the i’s, or all at once.
” = ” permits us to also SAVE (to disk) character strings of ASCII characters : the h’s, the i’s, the h’s and i’s, or the entire variable file.
“Buffer = NNN” indicates the number of characters (NNN) in the current typing buffer (u$).
“Cell Limit = NNN” indicates the number of characters (NNN) in current h or i, being filled. Note, that NNN also indicates the maximum number of characters of the typing buffer (u$), that will be stored, by invoking option #3. So, frequent reference to these numbers will allow trouble-free entry of paragraphs into your growing letter or document.
“H-i” indicates which data buffer h$(i) is being filled, by storing the typing buffer (u$) at item #3.
“I-j” does the same, when working on i$(j) ..
“FREE=NNNNN” indicates the amount (NNNNN) of free RAM, remaining for the 2068 to conduct string editing and other operations. The same information appears on the Function Menu, as well as other menus throughout Daisy, since memory utilization is so critical in the 2068.
“L$=k” indicates the current number (k) of characters in the L$ string, much used for Block Insert, as above. and for Block Delete, as the deleted material is automatically stored in L$.
And, lastly, “ed” is the BASIC address (ed=2926), to which transfer should be made, in order to recover the Quickie Menu display from most places of the program. For example, break into the program and type “GOTO ed” or “GOTO 2926”. Similarly, “GOTO fm” or “GOTO 2070” will recover the Function Menu display.
Next time, we will continue , by discussing the next entry on the Function Menu, #2, Print Header.