
This utility will be found useful in the inspection, analysis, and correction of errors on disks used on the LARKEN DD system. This utility is designed for use with the Larken 360K per disk I/F board.
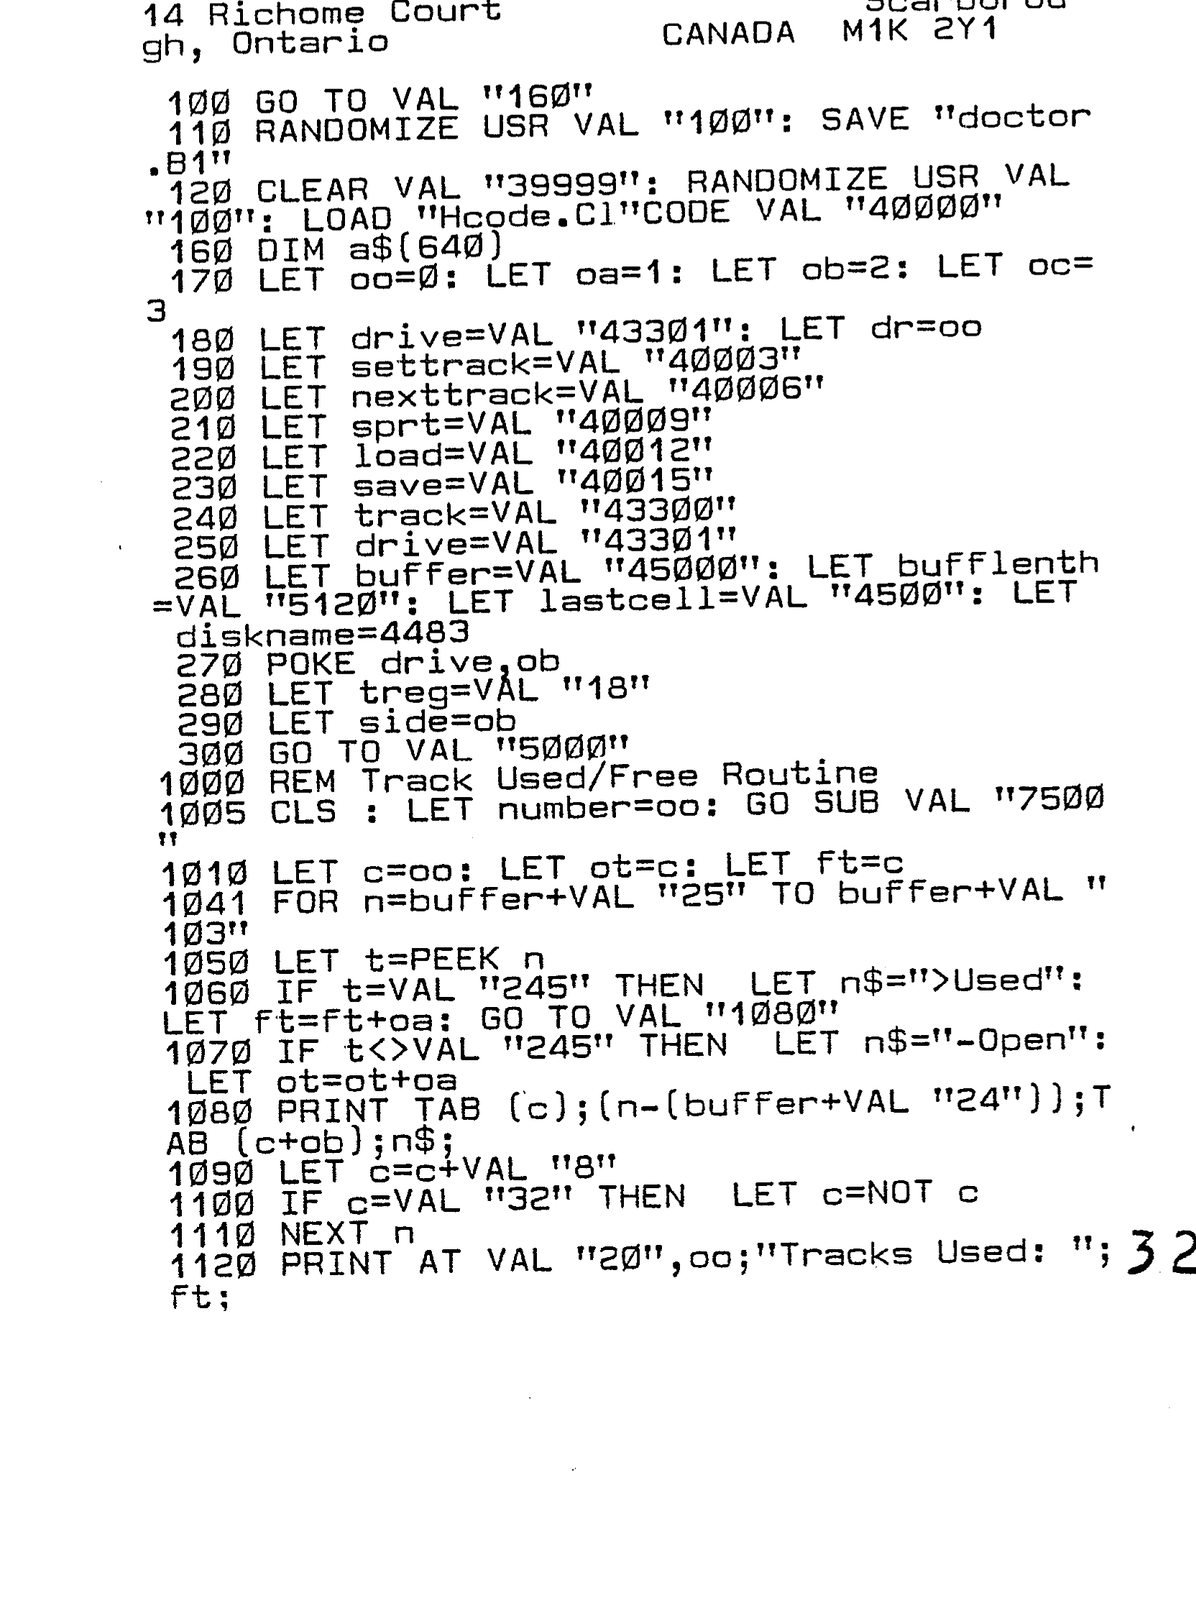
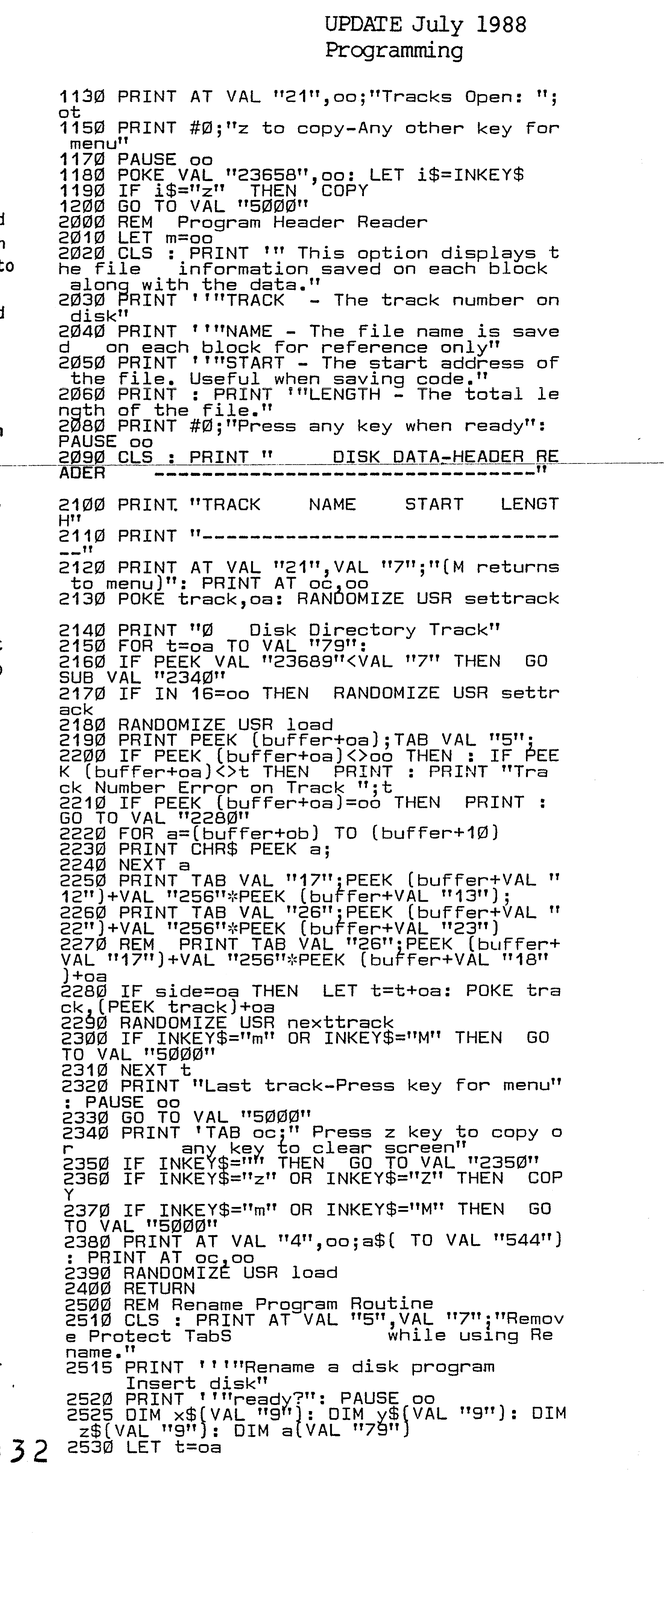
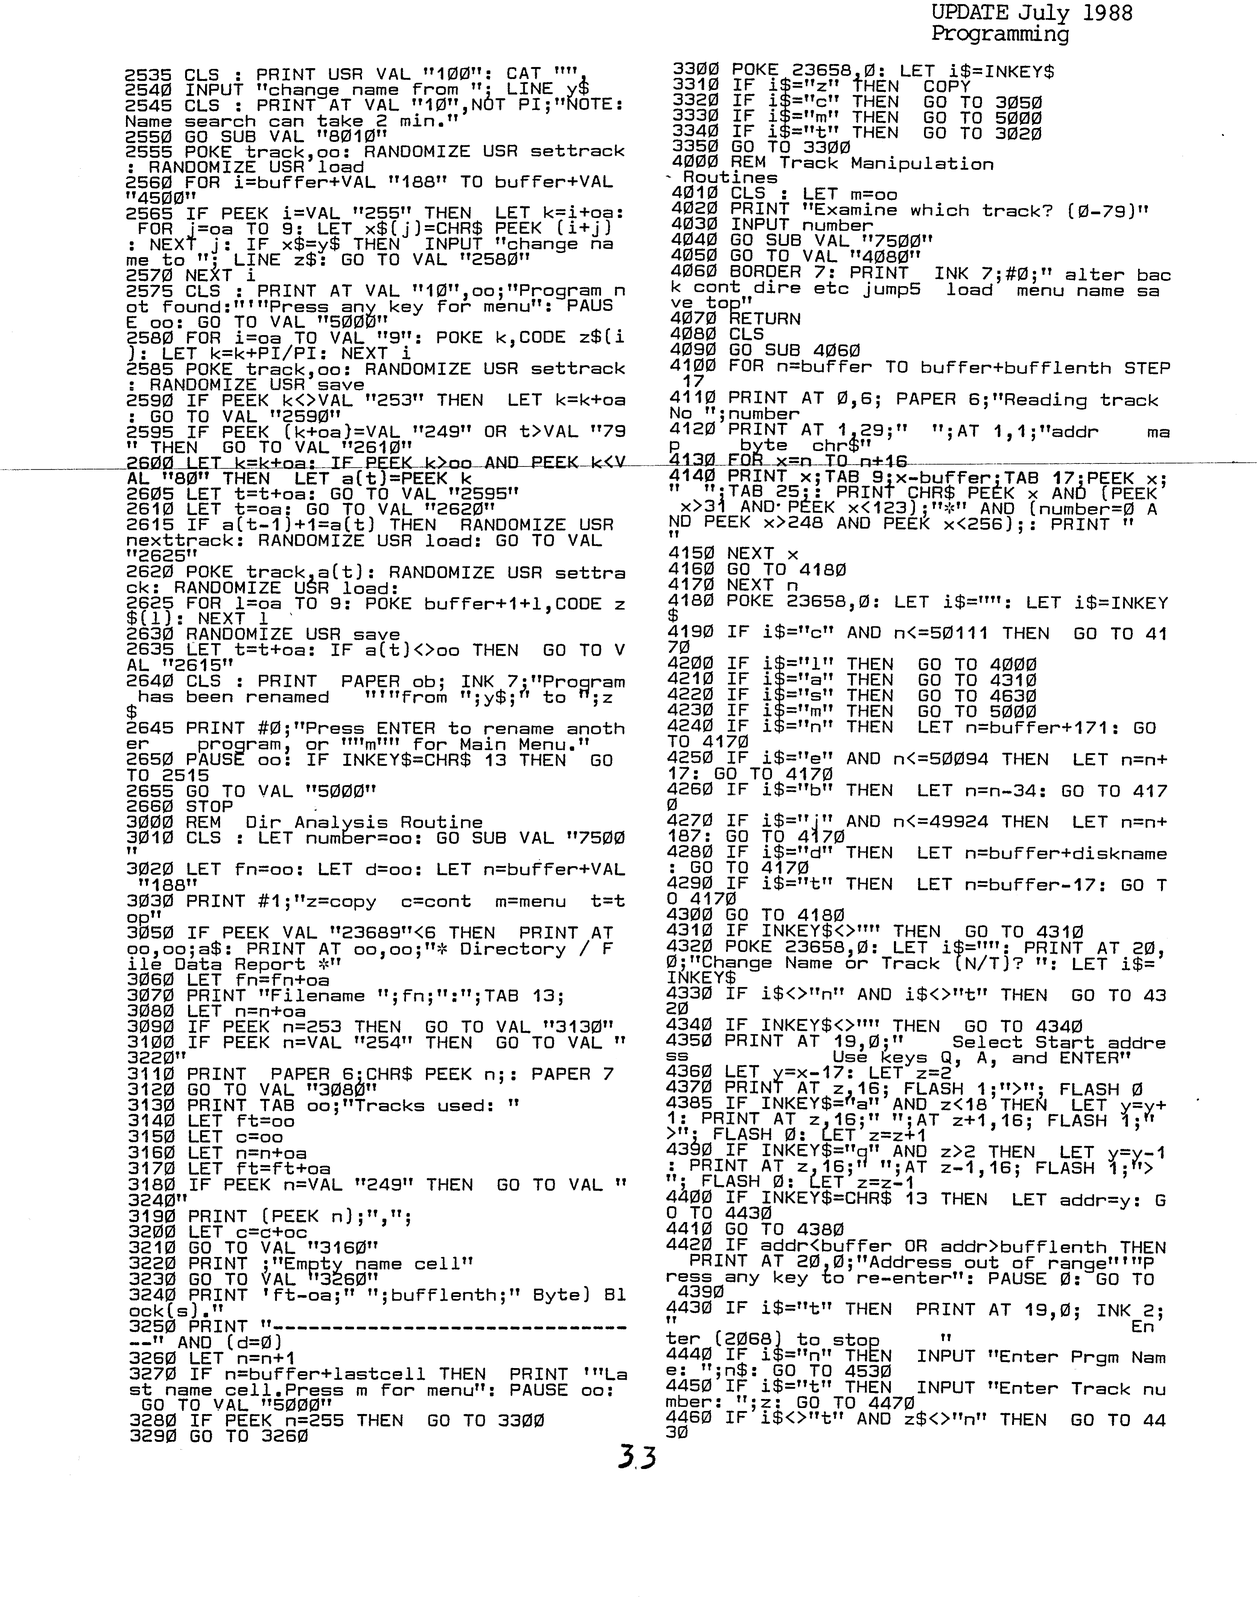
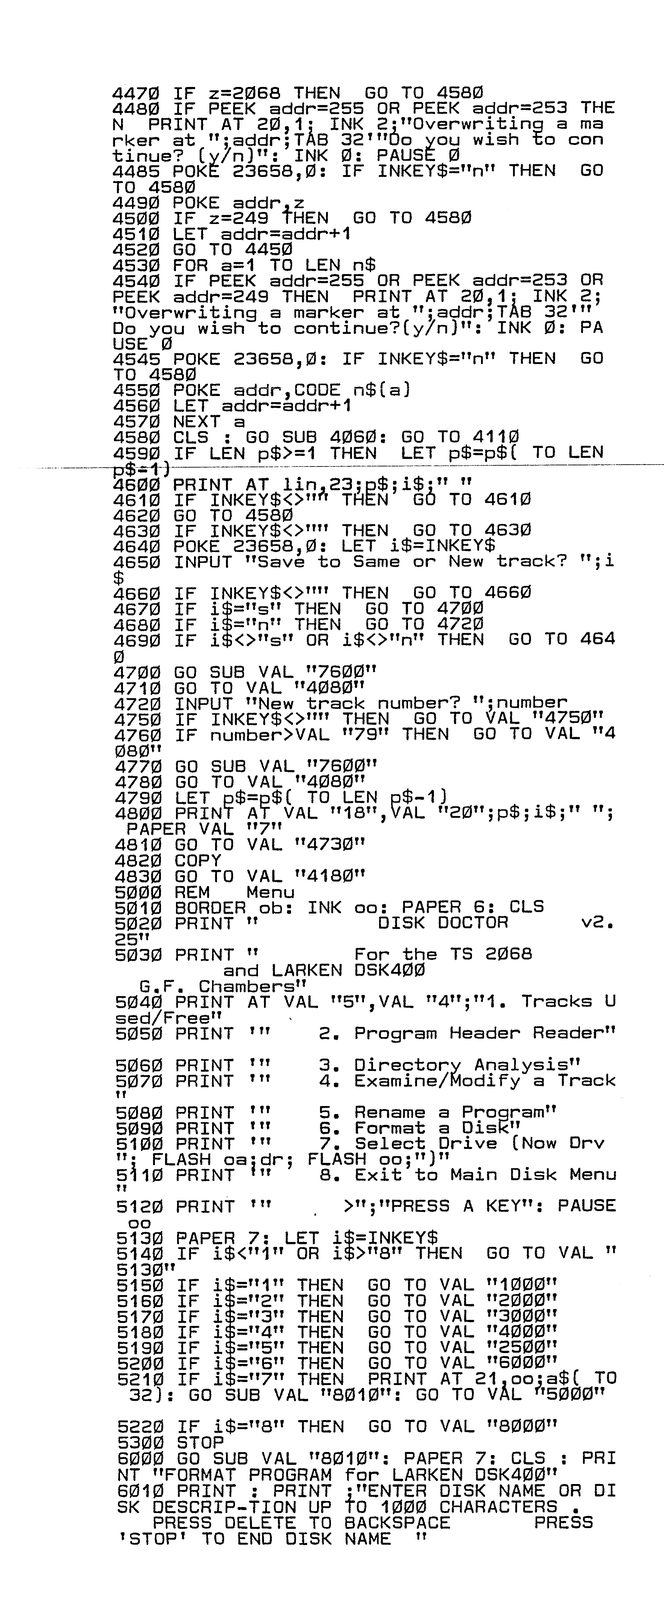
Entering the listing is straight-forward, however there are a couple of things which will not be evident from the listing.
Firstly, there are a number of buried color codes in the program which contribute to it’s ease of use.
A buried color code is entered into a listing by going into the “extended” mode, then pressing one of the keys 0 to 7 (the color keys). This has the effect of immediately changing the listing color. This effect also appears in program operation, which is why we are doing it. This new PAPER color will continue through the listing and the program, so it is necessary to make a change back to the normal PAPER color immediately after the effect is no longer wanted. Do this by entering a new color using the same routine. Usually this will be the “extended mode” key 7, to give a PAPER WHITE effect. If this command has been inadvertently entered incorrectly it can be deleted using the DELETE key in the normal manner except that you will find that two operations of the DELETE key are required.
Lines which require this color switch are as follows:
LINE 1060 yellow:  "½"
  "  1070 green:   "-"
  "  2510 red:     "REMOVE PROTECT TABS"
  "       red:     "while using Rename"
  "  2520 yellow:  "ready?"
  "  4060 green:   "initial letter of each command"
  "  4140 yellow:  "*"
  "  4320 yellow:  initial letter of each command
  "  4350 yellow:  letters Q and A
  "  4640 yellow:  initial letters of "Same" & "New"
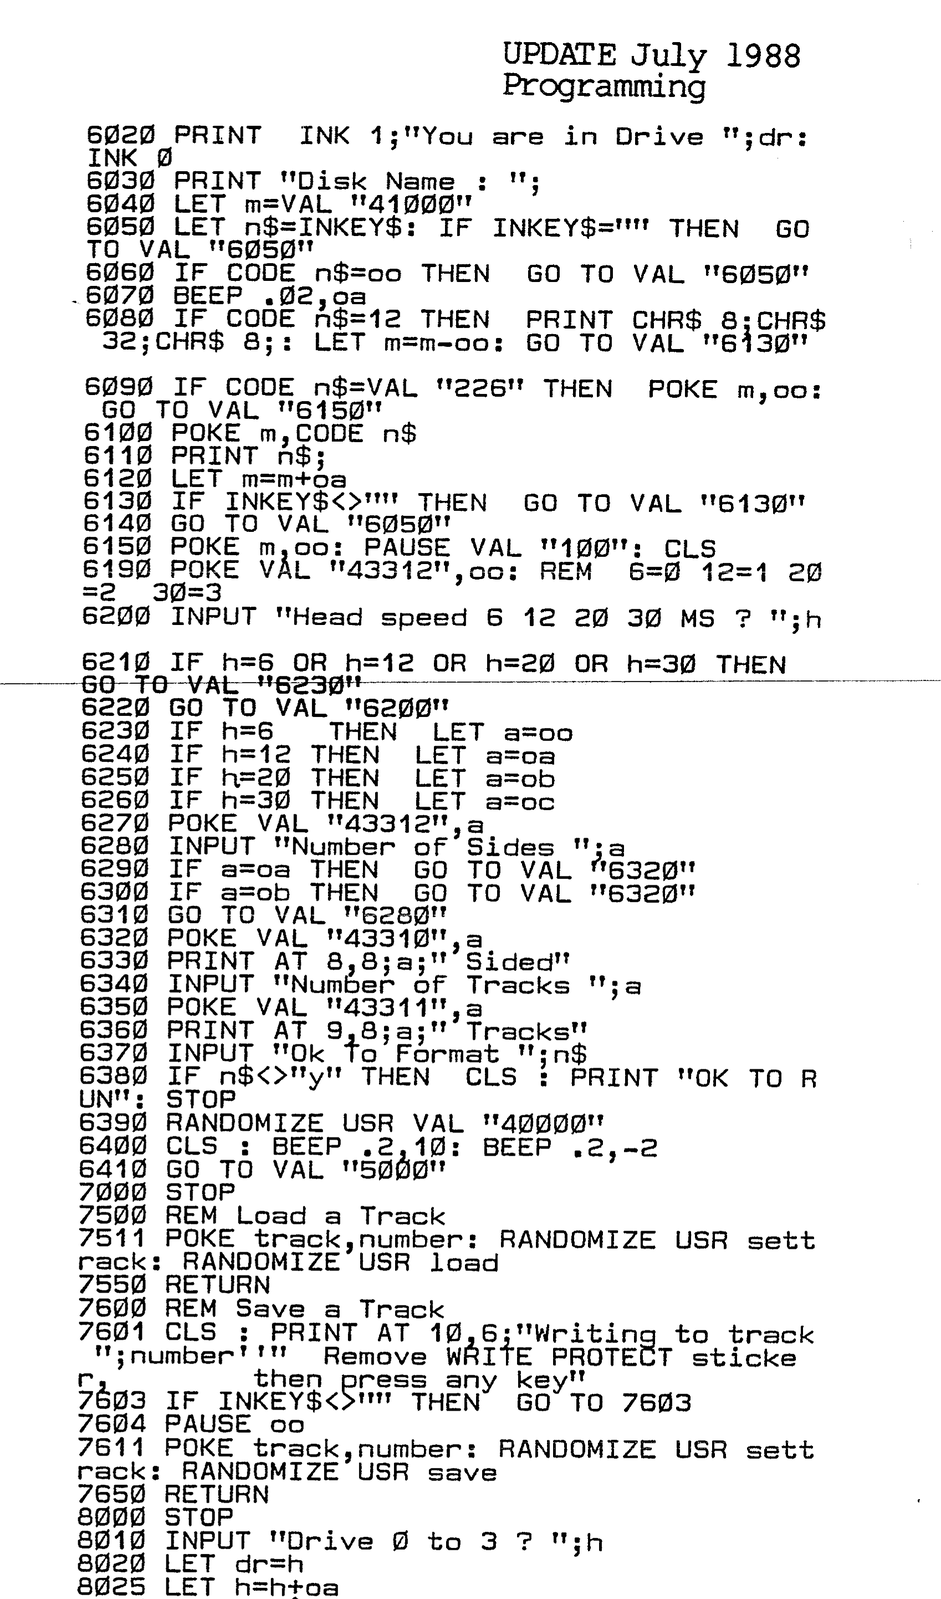
  "  7601 Red:     "Remove WRITE PROTECT sticker"
You may also choose to highlight the REM statements. (Don’t forget to insert the “extended” mode 7 after each of these entries)
Save the program by GO TO 110. Or to make it an AUTOSTART program by changing the line to read: 110 RANDOMIZE USR 102
The program makes use of the LARKEN “Hcode.C1” disk DOS routine, so it must be on the same program disk.
The program has been written to allow compilation by TIMEMACHINE. Lines 120 and 2535 would need to be removed however, due to the inability of TIMEMACHINE to handle uniquely LARKEN commands.
OPERATION:
Upon running the program you will be presented with a menu offering 8 choices.
Option 1. will give a screen display of the USED/IDLE status of all the tracks on the disk under scrutiny. As written it will handle DSDD disks correctly.
Option 2. is a Program Header Reader, which gives a track by track report of programs on the disk.
Option 3. provides track information about each program on the disk taken from the directory track.
Option 4 provides the capability of examining and modifying the data on a track. Most useful when used on track 0; the directory track.
Option 5. Offers a program rename capability.
Option 6. A Disk Formatting routine.
Option 7. To select a particular drive.
Option 8. To quit this program. Calls up a Menu.B1 program. Can be modified to suit needs.
The use of option 4 requires more explanation. It’s biggest use will be on track 0 as mentioned earlier. When Option 4 is called up you will be asked for a track number. Most often wanted will be track 0, the track which holds the disk directory. Enter a 0. The program then proceeds to load the contents of that track into a buffer area in the computer starting at address 45000. It is at this point that we can access the buffer, inspect it, make changes to it, and resave it, with or without changes as desired.
First we will briefly cover the makeup of track 0. The first 168 bytes of this track are concerned with disk status. After that comes a series of “cells” containing a record of one of the programs that has been saved on the disk. Each cell contains the program name and the track numbers that the program occupies, plus 3 or 4 markers used by the DOS to mark the program location. Each cell occupies 34 bytes. There is room for as many as 100 such cells on this track (though rarely are that many used). Towards the end of the track is the disk name.
This is the briefest of outlines of the track makeup; sufficient only to permit an explaination of the use of the commands shown in option 4.
When Option 4 has been selected and track 0 chosen you will be presented with a display of the contents of that track starting with byte 0. This is not particularly interesting at the moment so press the C (continue) key. This will advance you to the first program name cell. The screen shows the first 17 bytes of this cell. Pressing C again will display the next 17 bytes of the cell. Pressing C key a third time will bring the first half of the second cell onto the screen.
To move back by one screen press the B (back) key. Or, if you wish to move onto the start of the next cell then press the E (etc) key. This will move you forward by a complete name cell, rather than a half a cell. If you wish to move forward even more quickly then press the J (jump) key and you will advance by 5 cells.
If you press the D (dire) key you will jump forward approximately 3600 bytes to where the Disk name is stored. Or by pressing the T (top) key you will return to the very start of the buffer where you first entered. These commands then, control your movement through the buffer.
Now to cover those commands which allow you to modify the buffer.
Press the A (alter) key, and you will be presented with the option “Name or Track”. Choose N if you wish to change a program name, or T if track numbers are to be modified. A cursor will appear on screen, and you can position it on the screen by using keys Q, A, and ENTER. This will determine where the new entry is to start. Then enter the desired changes. Terminate the entry and you will see the changes you have made reappear on the screen.
When you have made the desired changes you may then choose to save them to disk by pressing the S (save) key. You will be asked whether you wish to save the buffer to the same track (usually) or to a new track. The L (load) key permits you to load another track into the buffer, while the M (menu) key will bring back the main menu.
This has necessarily been a very abbreviated description of the operation of this program, and it may be adequate for some. If wish a more complete set of instructions you may obtain these by sending $3 to my address shown at the top of this listing.
Note: This excellent LARKEN program cannot be included in the July/April Issue disk because the disk space is maxed out and there is no space left. But not to worry! This and another absolutely GREAT Disk Manager program (for next issue) will be included in the next issue disk, along with some Larken programs by Larry Kenny.